

Site Settings
Site Settings
Within the CMS there are various settings you'll find in the left-hand menu that can impact changes across all of your website. Below you'll find more information about the main site settings that are available (title, description, contact us, etc.) found under Settings and the additional settings (problem reports, protected access, tags, etc.) found in the left navigation menu.
Example: CMS5 Settings
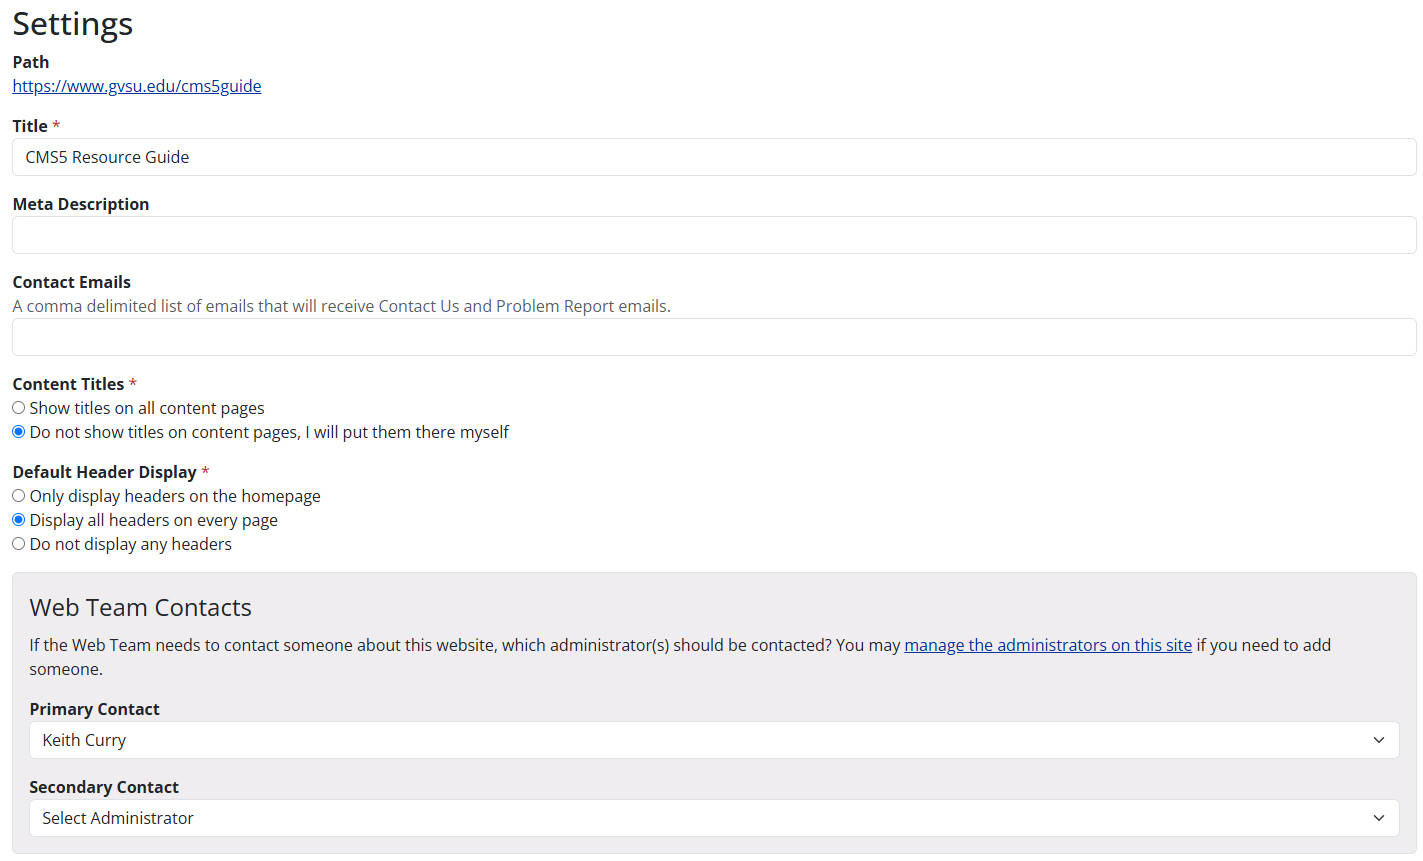
Title
- Specify the name of your website and its ideal pathway (/mysite/) when requesting a new CMS5 site. If you ever need to change the website name post-creation, you can easily edit it here.
Meta Description
- Provide a brief description of your website's purpose. This is provided when you request a new CMS site, but it can be edited here.
Contact Emails
- A comma delimited list of emails that will receive Contact Us and Problem Report emails.
Content Titles
- By default, the titles of your content pages will be visible. However, you can opt to turn this feature off and add custom titles to your pages by using headers each page's editor node.
Default Header Display
- The default setting displays aheader solely on the homepage. If preferred, adjust settings to showcase headers on all pages or eliminate them entirely from your website.
Web Team Contacts
- Enter the primary and secondary contact for your website. These will be the contacts the Web Team will reach out to should they need to.
Access Logs
- Here you can see a log of all of the administrators who have accessed the CMS5 editor of your website. The log shows:
- Administrator
- Category (of content)
- Activity
- Date & Time
Administrators
- Learn more about managing administrators in our administrator guide.
Descriptors
- These descriptors are utilized by the form builder and RSVP forms on an events module to facilitate online payments. Administrators can conveniently view all transactions through the Credit Card Admin.
Problem Reports
- The CMS will frequently scan your site and identify any problems that will need to be addressed. For example your site might include a broken link or a 404 error. When the scanning tool catches one of these errors you will get an alert and all errors will be logged in the problem reports section. Should you require assistance on fixing the problem, please do not hesitate to reach out to the web team.
Protected Access
- Protected access allows you to create group where only certain people can view a specific file, content item or form. To create a protected access group:
- Click on Protected Access.
- Give this group a name (Title).
- Select from the various segments:
- All Students
- All Faculty/Staff
- All Retirees
- Custom Usernames and Passwords: Here you will create unique user names and passwords for individuals to login in with.
- Specific GVSU Network Logins: Here you will use specific users' @gvsu.edu accounts.
- Once the group is created, on the piece of content you want protected you can select the new group under Permissions located under More Options.
Tags
- A tag is a label for a file or a content item that allows you to categorize the content on your site. To add a new tag simply click New Tag, enter the desired tag's name and click submit.
Page last modified April 16, 2025