Modules Overview
Within the CMS, alongside Chunks, we have Modules, which offer enhanced and specialized functions for customizing your website. Read through the guide below to understand what each module does, when to use it, and how to add it to your page. You can use the menu for quick navigation to a specific module or scroll through to see all the available options.
Jump to a specific module
Before You Begin
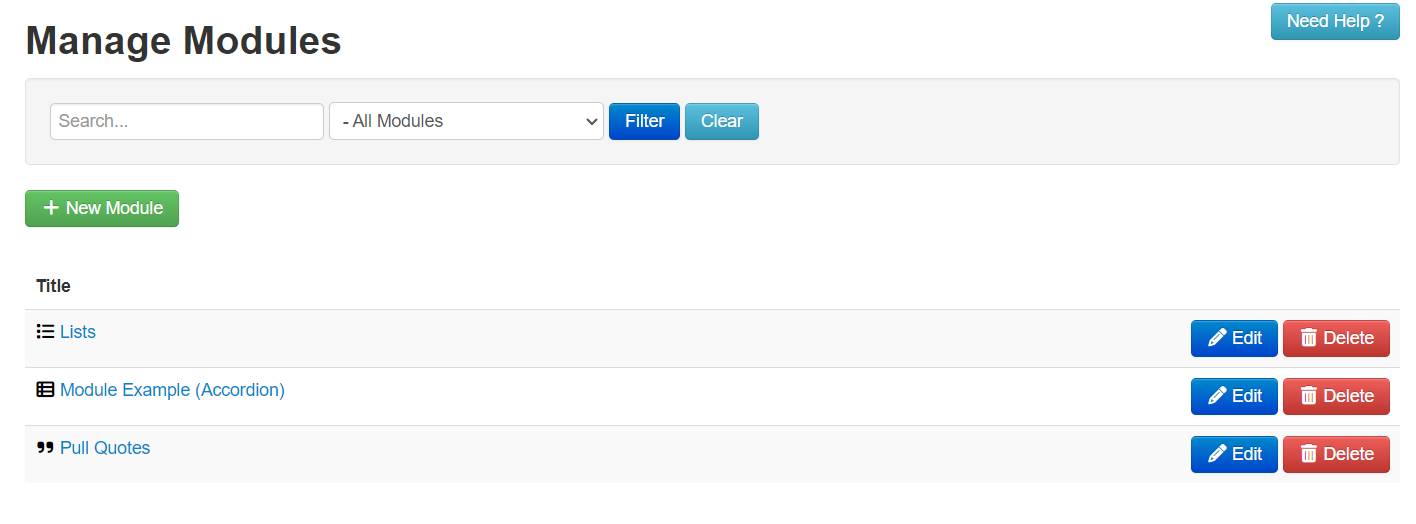
In this overview we will be walking through the steps to create and add each of our various modules to a content page within you website. The starting point for all of the modules is to first go to the Manage Modules section of your CMS account by clicking on it from the navigation menu when you first login to the CMS. From this page you can add any new module to your website as well as edit all existing modules. Think of Manage Modules as the central hub for you to access, edit, and create any module you will need to use for your site.
Modules
Accordion
What is it?
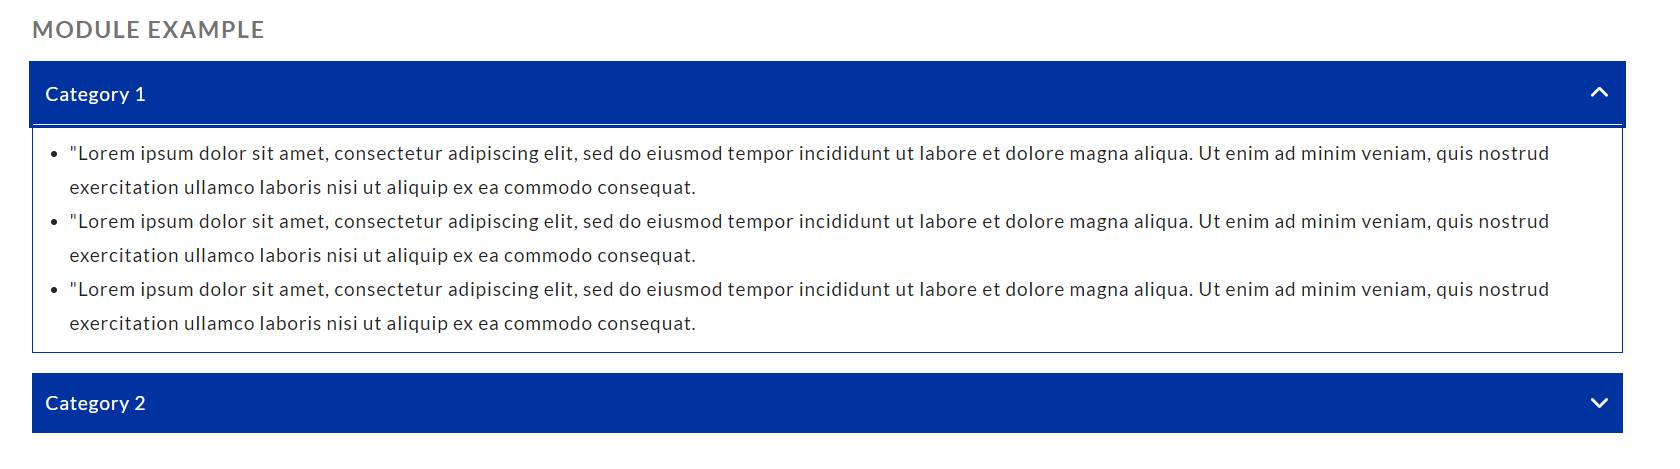
An accordion module is a element that allows content to be collapsed or expanded when clicked or tapped.
When should I use it?
To organize information hierarchically, by presenting a summary or title that expands to reveal additional details when selected.
How do I create one?
- Click + New Module and select accordion.
- Give your accordion a name if desired.
- Click + Add Panel.
- Fill in the title with title or summary you want displayed.
- Fill in the content section with the information you want only to be visible when when clicked via dropdown.
- Choose whether the content is closed (default & recommended) or open when a page loads.
- Click submit when done.
- Repeat steps 2-6 for as many sections as desired.
Adding the module to a content page:
- Click edit on the page you want to add the module to.
- Click manage modules from the toolbar on the right.
- Select the accordion module you created in the steps above.
- Drag the accordion module to its desired location on the page, and resize if needed.
- Click edit on the module to adjust the following display settings:
- Show or hide the accordion module heading.
- Choose the color of the accordion (default and recommended is GVSU Blue).
- Answer if the content is a Frequently Asked Questions (FAQ) section or not.
- Add a highlight of blue or gray if desired.
Back-End Example

Front-End Example
Banner Ads
What is it?
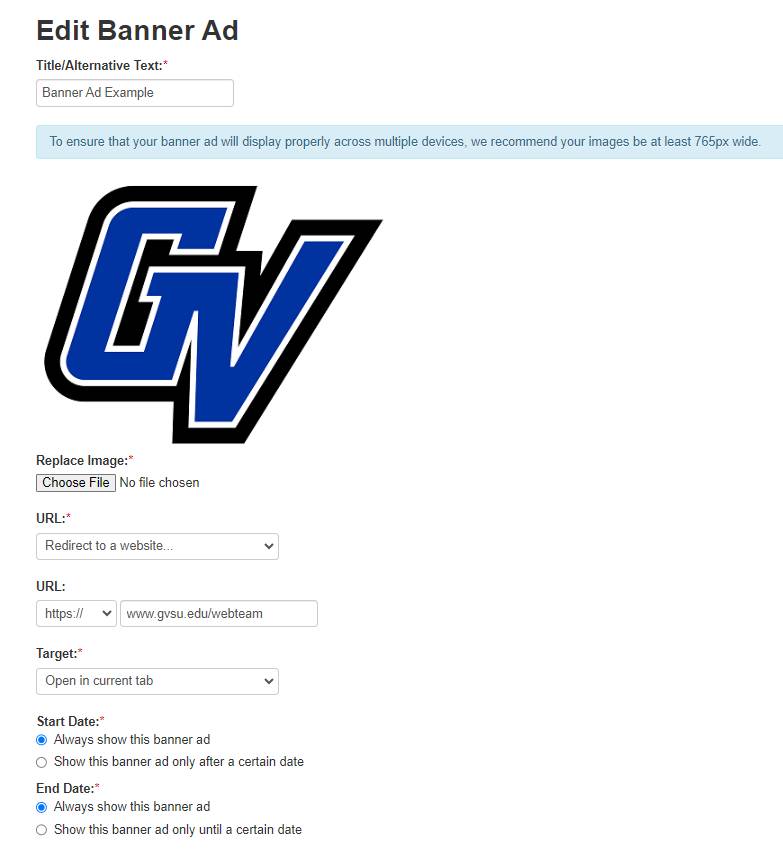
The Banner Ad module serves as an eye-catching graphic display enabling users to showcase clickable images, captivating visitor attention effectively.
When should I use it?
When aiming to direct your audience to a particular website or landing page, a linkable image helps draw their attention.
How do I create one?
- Click + New Module and select banner ad.
- Give your banner ad module a name if desired.
- Click + Add Ad.
- Fill in the title with the title you want displayed.
- Add the banner ad image by clicking on Choose File.
- Choose what the banner ad will be linked to. Options include:
- Redirect to another website
- Link to a file in File Manager
- Site Index
- Protected Files
- A different page within your website
- Choose whether when clicked, the link will open in the current or a new tab.
- Pick the start and end dates for the banner ad if it will not always be available.
- Add a caption to add more context to the banner ad if desired.
- Click submit when done.
- Repeat steps 2-9 for as many banner ads as desired.
Adding the module to a content page:
- Click edit on the page you want to add the module to.
- Click manage modules from the toolbar on the right.
- Select the banner ad module you created in the steps above.
- Drag the banner ad module to its desired location on the page, and resize if needed.
- Click edit on the module to adjust the following display settings:
- Show or hide the module heading.
- If you have multiple ads in your module, choose how many to show at once.
- Choose if you want the ads to be displayed in order or randomly.
- Choose to hide or show the title for each banner ad.
- Choose to hide or show the caption for each banner ad.
- Add a highlight of blue or gray if desired.
Back-End Example
Front-End Example
Blog
What is it?
A blog is a part of a website where content editors can share their thoughts & experiences, update their audience, & more.
When should I use it?
Use the blog module when you want to consistently share updates or information with your audiences about content related to your website.
How do I create one?
- Click + New Module and select Blog.
- Give your blog a name if desired (optional).
- To add your first blog to the module click + Add Entry.
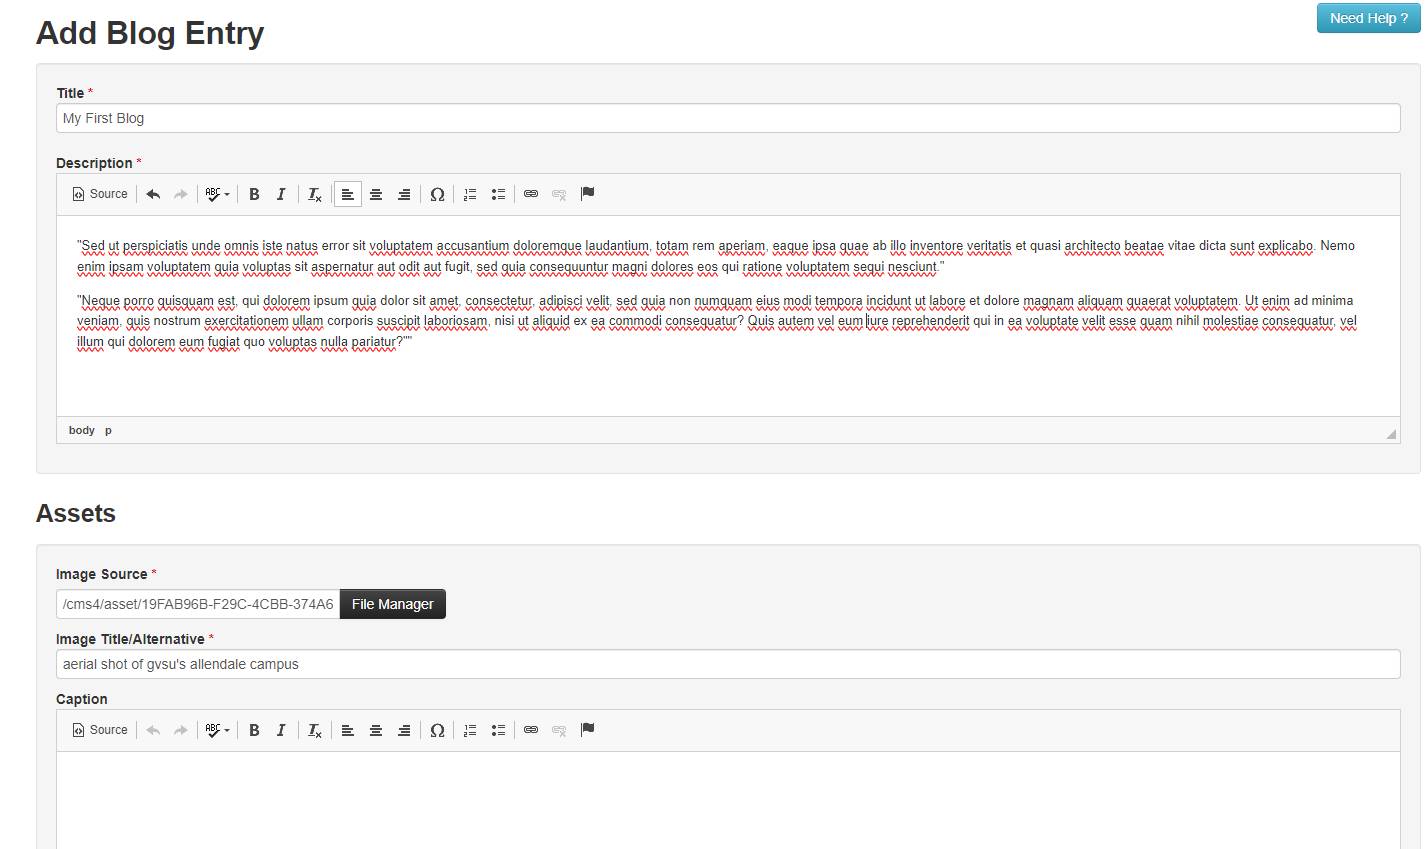
- On Add Blog Entry you will create your first blog post for the module:
- Give your blog a title.
- Write your blog in the description text editor box.
- If desired, you can add various assets (images & videos) using the green asset buttons below the description box.
- Adding assets follows the same steps as uploading media in a image chunk.
- Finally, under additional information you can choose to change the publishing date or hide who the author of the blog post is.
- Click submit when done to publish your blog to the module.
Adding the module to a content page:
- Click edit on the page you want to add the module to.
- Click manage modules from the toolbar on the right.
- Select the blog module you created in the steps above.
- Drag the blog module to its desired location on the page, and resize if needed.
- Click edit on the module to adjust the following display settings:
- Show or hide the blog module title.
- Limit the number of blog posts you want showing on the page.
- Show the entire blog post or only show the blog post title and author.
Back-End Example
Front-End Example
[1711049303].jpg)
Day in History
What is it?
A module that lets you highlight a specific event in history relevant to your site's content.
When should I use it?
When you want to add an element to a page to highlight the importance of an anniversary to your audience.
How do I create one?
- Click + New Module and select Day in History.
- Give your module a name if desired.
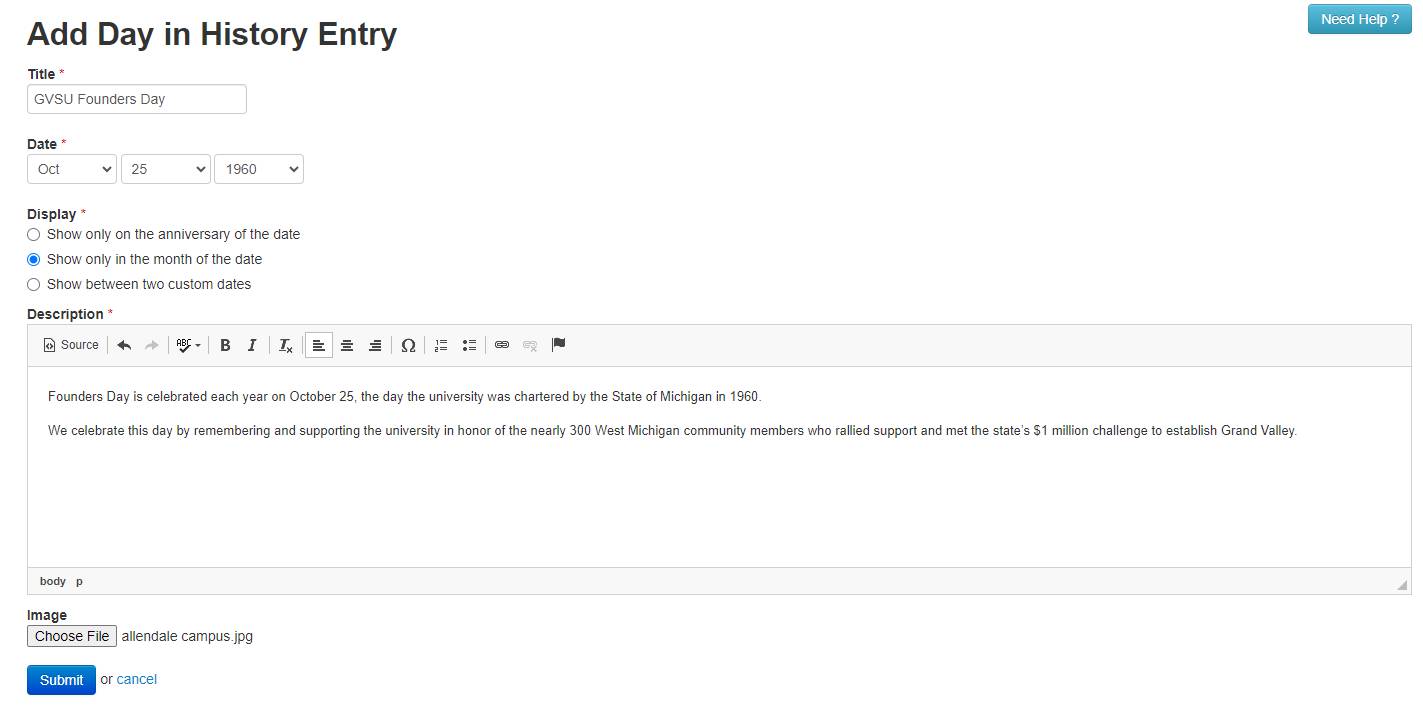
- Click + Add Day in History.
- Fill in the title with the name of the event.
- Select the date of the anniversary.
- Choose whether to display:
- The module only on an anniversary of the date in step 4.
- The module during the entire month of the date in step 4.
- The module during a date range you manually select.
- Add a description detailing what the event is and why it is being celebrated.
- Add a image to the post if desired.
- Click submit when done.
- Repeat steps 2-8 for as many days as desired.
Adding the module to a content page:
- Click edit on the page you want to add the module to.
- Click manage modules from the toolbar on the right.
- Select the day in history module you created in the steps above.
- Drag the module to its desired location on the page, and resize if needed.
- Click edit on the module to adjust the following display settings:
- Show or hide the module heading.
- Select the number of entries you want displayed on the page.
- Add a highlight of blue or gray if desired.
Back-End Example
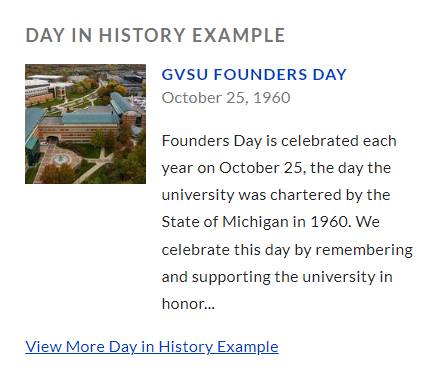
Front-End Example
Events
What is it?
An assortment of manually inputted events, presented in either a list format or a calendar view.
When should I use it?
When seeking to provide a dedicated section for your audience to access and view all upcoming events hosted by your department.
How do I create one?
- Click + New Module and select events.
- Give your event module a name if desired.
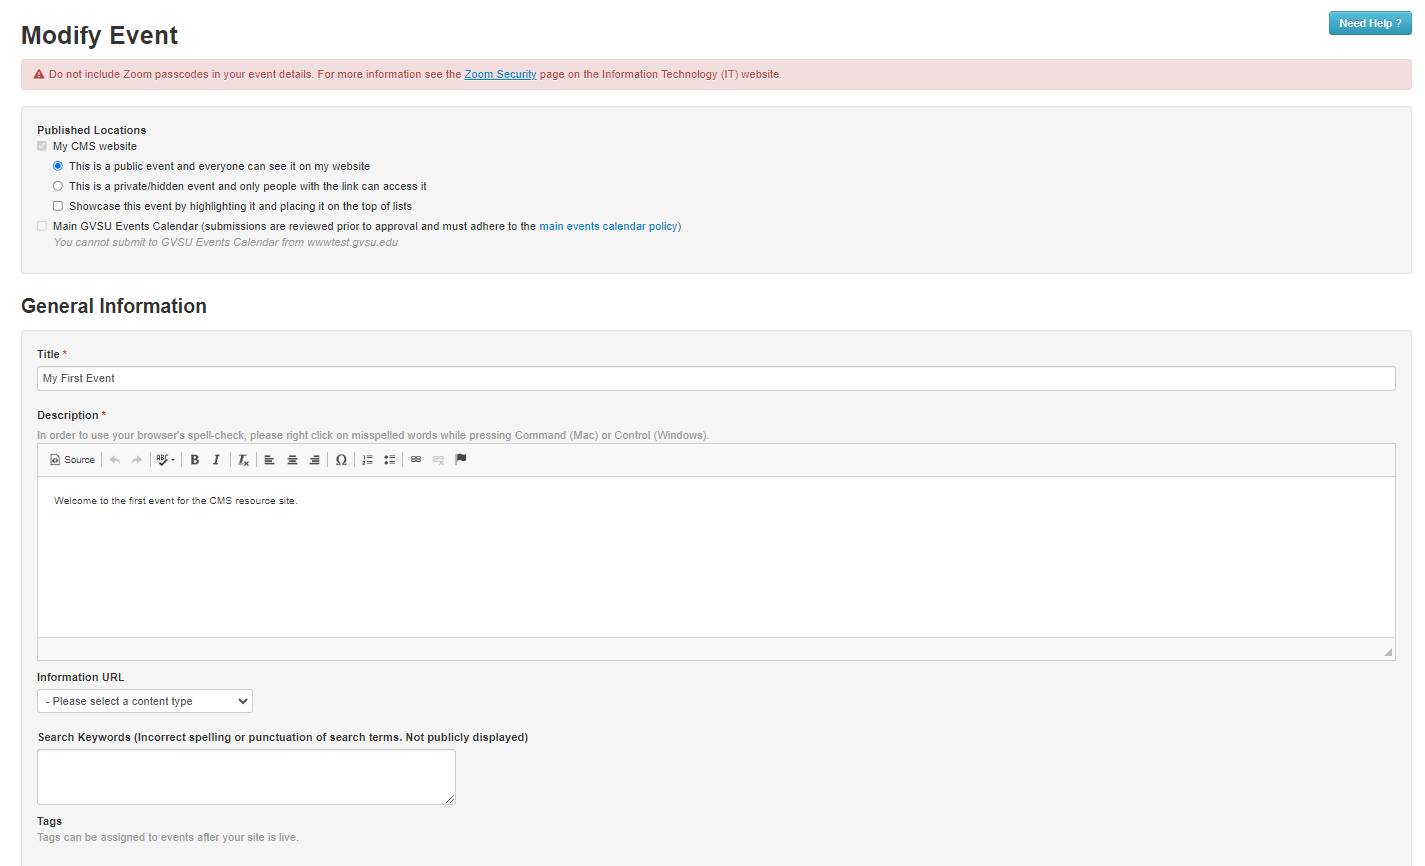
- Click + New Event.
- Select if the event will be public (everyone can see it) or private (only those invited can see it).
- Give your event a title under General Information.
- Add the description of your event in the text box below the title.
- If you are linking to more information, select the type of URL you will be sending your audience to in the Information URL dropdown.
- For filtering and search purposes, you can add tags to your event. This will not be publicly displayed and will allow you to filter the module to only show events with specific tags if desired.
- Select the date and start/end times for the event.
- Select whether the event will repeat or not. If so, add in the dates to the text box below the dropdown menu.
- Add an image to your event if desired using the Choose File button.
- Under the image you can add a caption to provide more information to your audience.
- Add optional contact information.
- Add optional location information.
- Select whether the event will allow for registrations from one of the available options.
- Click Submit when done.
- Repeat steps 2-14 for as many events as desired.
Adding the module to a content page:
- Click edit on the page you want to add the module to.
- Click manage modules from the toolbar on the right.
- Select the event module you created in the steps above.
- Drag the event module to its desired location on the page, and resize if needed.
- Click edit on the module to adjust the following display settings:
- Show or hide the event module heading.
- Select the number of events to display.
- Select if all events or only specific tags (see above) will be displayed.
- Select if event descriptions will be displayed or hidden.
- Select if event images will be displayed or hidden.
- Add a highlight of blue or gray if desired.
*Special Note on Events in the Navigation Menu
If you prefer your event module to be featured as a distinct page accessible via the navigation menu at the top of your site, we recommend watching our video tutorial on configuring the event module within the navigation menu.
Back-End Example
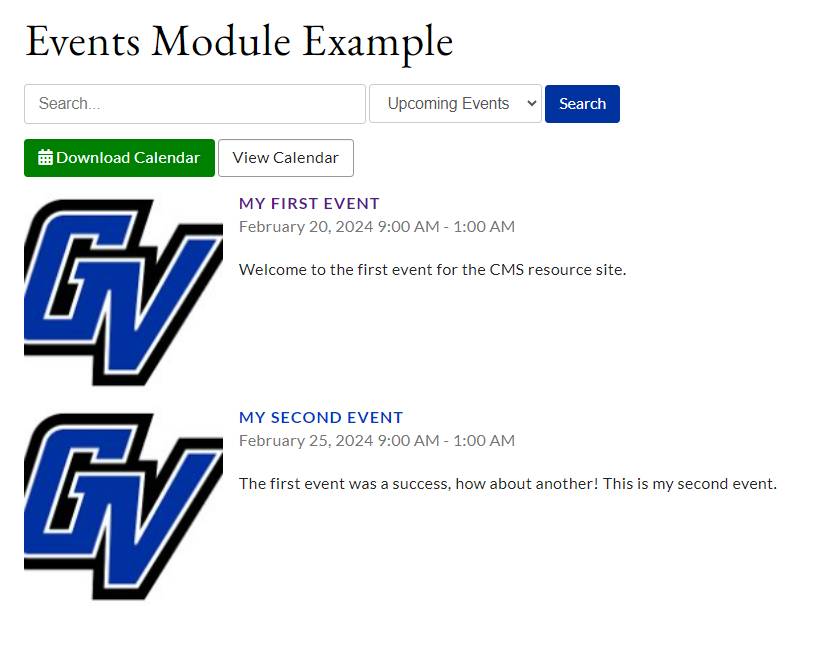
Front-End Example
GVNow News
What is it?
A automatically updated feed showcasing recent stories from GVSU's news publications.
When should I use it?
When you want to feature GVSU news stories related to a specific topic on your website.
How do I create one?
- Click + New Module and select GVNow News.
- Give your module a name if desired.
- Click the dropdown menu to add a tag.
- Select the tag (topic) of the news stories you want displayed.
- Click Add.
- Repeat steps 2-4 for all tags you want showcased.
Adding the module to a content page:
- Click edit on the page you want to add the module to.
- Click manage modules from the toolbar on the right.
- Select the GVNow News module you created in the steps above.
- Drag the GVNow News module to its desired location on the page, and resize if needed.
- Click edit on the module to adjust the following display settings:
- Show or hide the module heading.
- Select how many articles you want to display at once.
- Select whether or not to show the story descriptions.
- Select whether or not to show the story images.
- Add a highlight of blue or gray if desired.
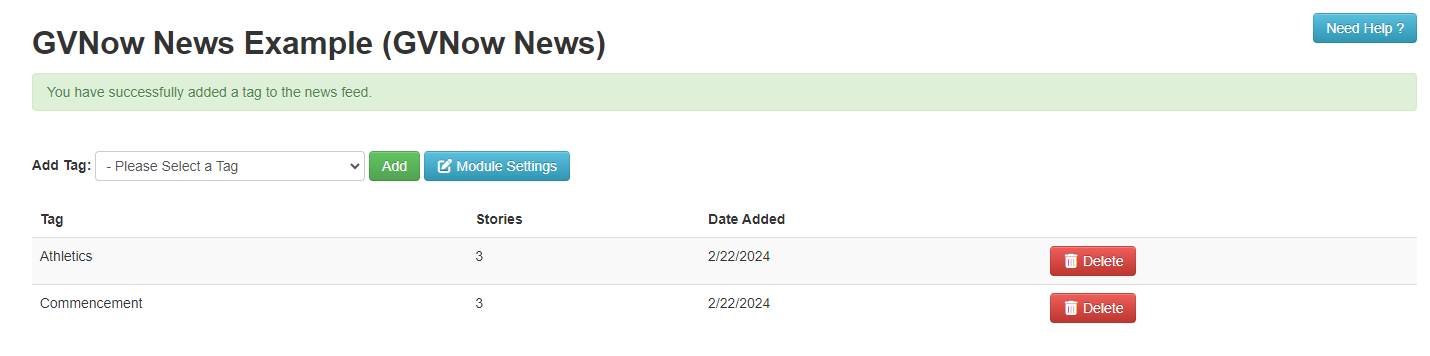
Back-End Example
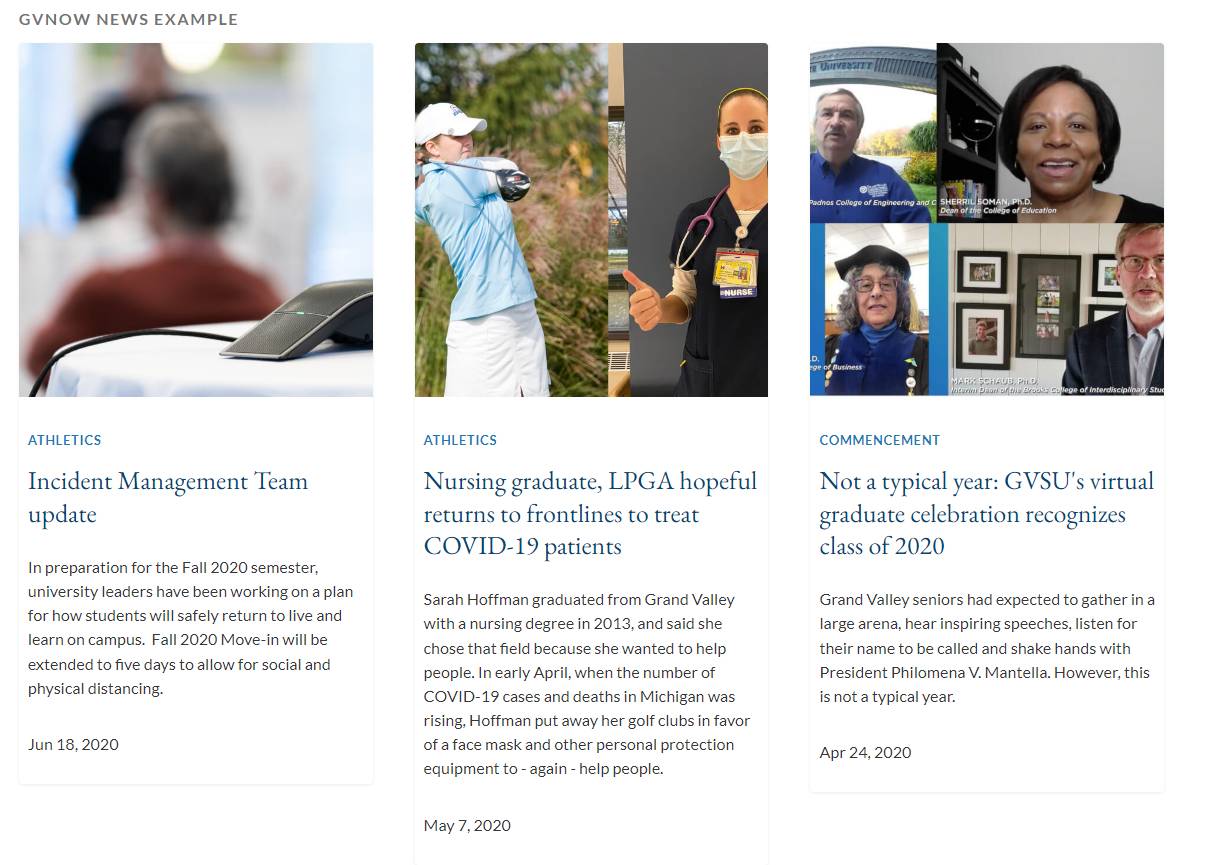
Front-End Example
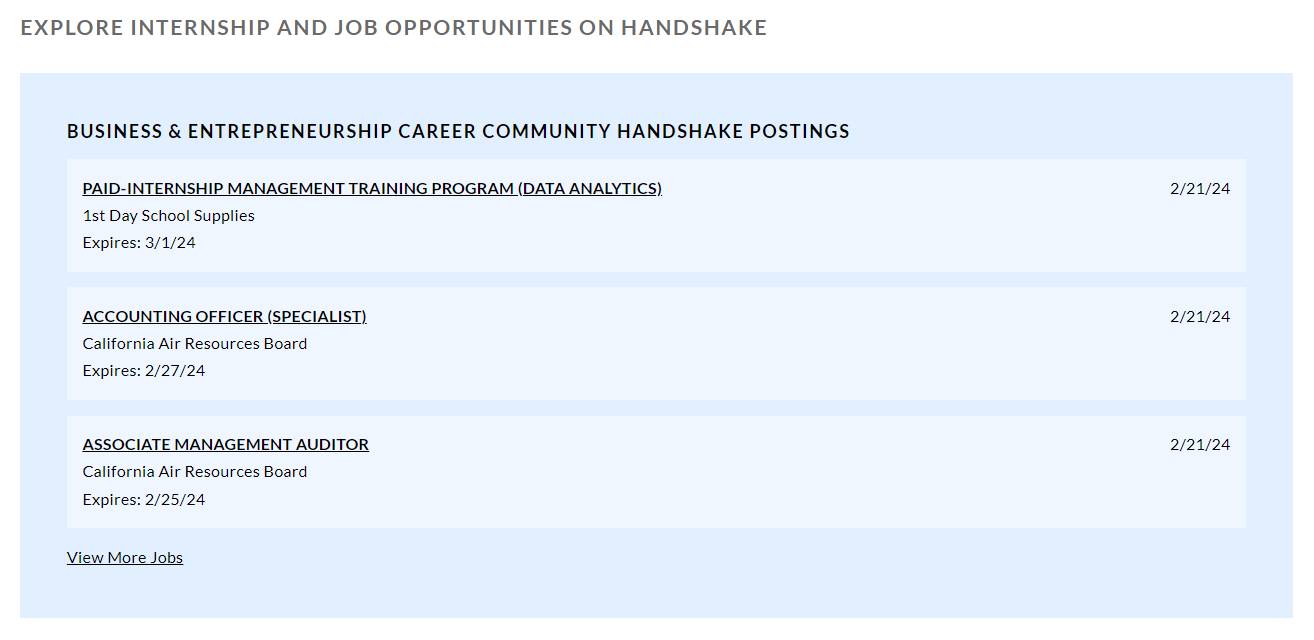
Job Feed
What is it?
A list of updated job openings that is linked to GVSU's Career Center.
When should I use it?
To showcase open positions from a job feed that GVSU's Career Center has posted.
How do I create one?
- Click + New Module and select Job Feed.
- Give your module a name if desired.
- From the dropdown menu, select the job feed you want displayed.
- Click Add.
- Repeat steps 2-3 for as many job feeds as you want to feature on your page.
Adding the module to a content page:
- Click edit on the page you want to add the module to.
- Click manage modules from the toolbar on the right.
- Select the Job Feed module you created in the steps above.
- Drag the Job Feed module to its desired location on the page, and resize if needed.
- Click edit on the module to adjust the following display settings:
- Show or hide the module heading.
- Select how many number of positions you want to display.
- Add a highlight of blue or gray if desired.
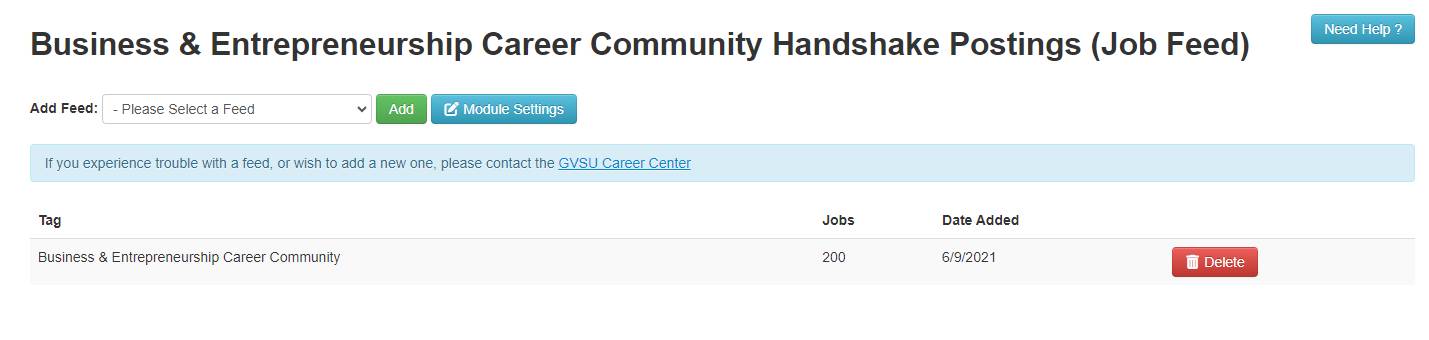
Back-End Example
Front-End Example
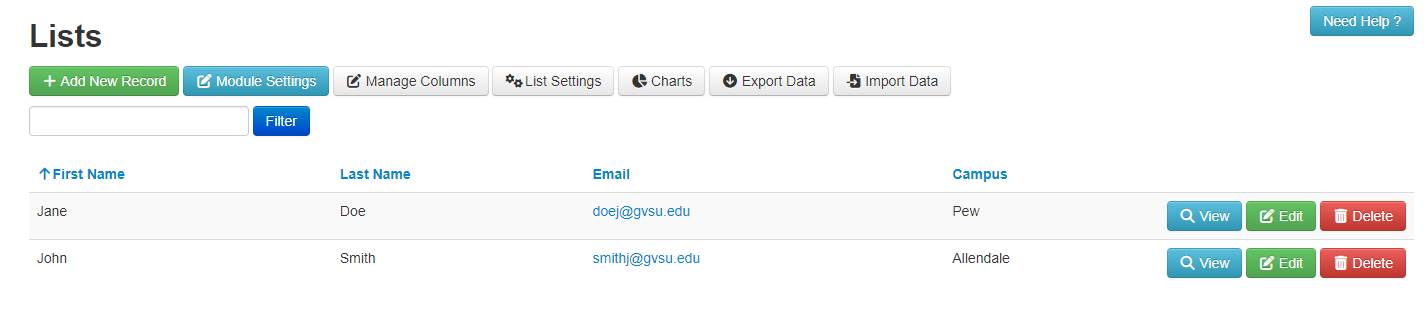
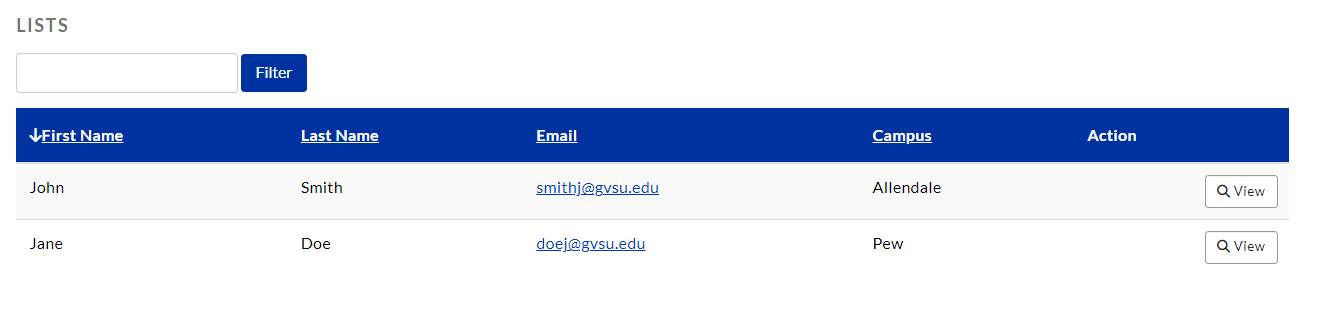
Lists
What is it?
A module designed to present information in organized, visually appealing lists for effortless comprehension and readability.
When should I use it?
If you have a large amount of information you want to share in a list format such as: staff directory, programs available, resources to share, etc.
How do I create one?
- Click + New Module and select lists.
- Give your list a name if desired.
- If you are uploading a premade list (must be in xlsx, xls, or csv format) click the Import Data button to begin your upload.
- Once the file is uploaded, you will then need to map your columns.
- Select from the drop down menus the column title you want for each column from your list.
- Once the list import matches your premade list, click Import.
- If you are creating a list from scratch:
- Click Manage Columns
- Click the green + Add Column button
- Give your column a name, select the type of information that will be displayed, and the correct format depending on your information type.
- Select whether to display your column title as a filter or if you want it displayed on the list all together.
- Repeat steps 2-4 to add additional columns.
- Once the columns have been created, click the green + Add New Record button. This is the information that will populate in your columns.
- Fill in the information matching each of the columns from the steps above.
- Click Save to submit the record and go back to the module's home screen, or click Save & Add Another Record to continue adding records (rows) to your columns.
- Once you are satisfied with the information in your list you can click List Settings to make additional changes to how the information will be displayed on your page.
Adding the module to a content page:
- Click edit on the page you want to add the module to.
- Click manage modules from the toolbar on the right.
- Select the list module you created in the steps above.
- Drag the list module to its desired location on the page, and resize if needed.
- Click edit on the module to adjust the following display settings:
- Show or hide the module heading.
- Select the layout for how the list will be displayed on your webpage.
Back-End Example (Lists)
Front-End Example (Lists)
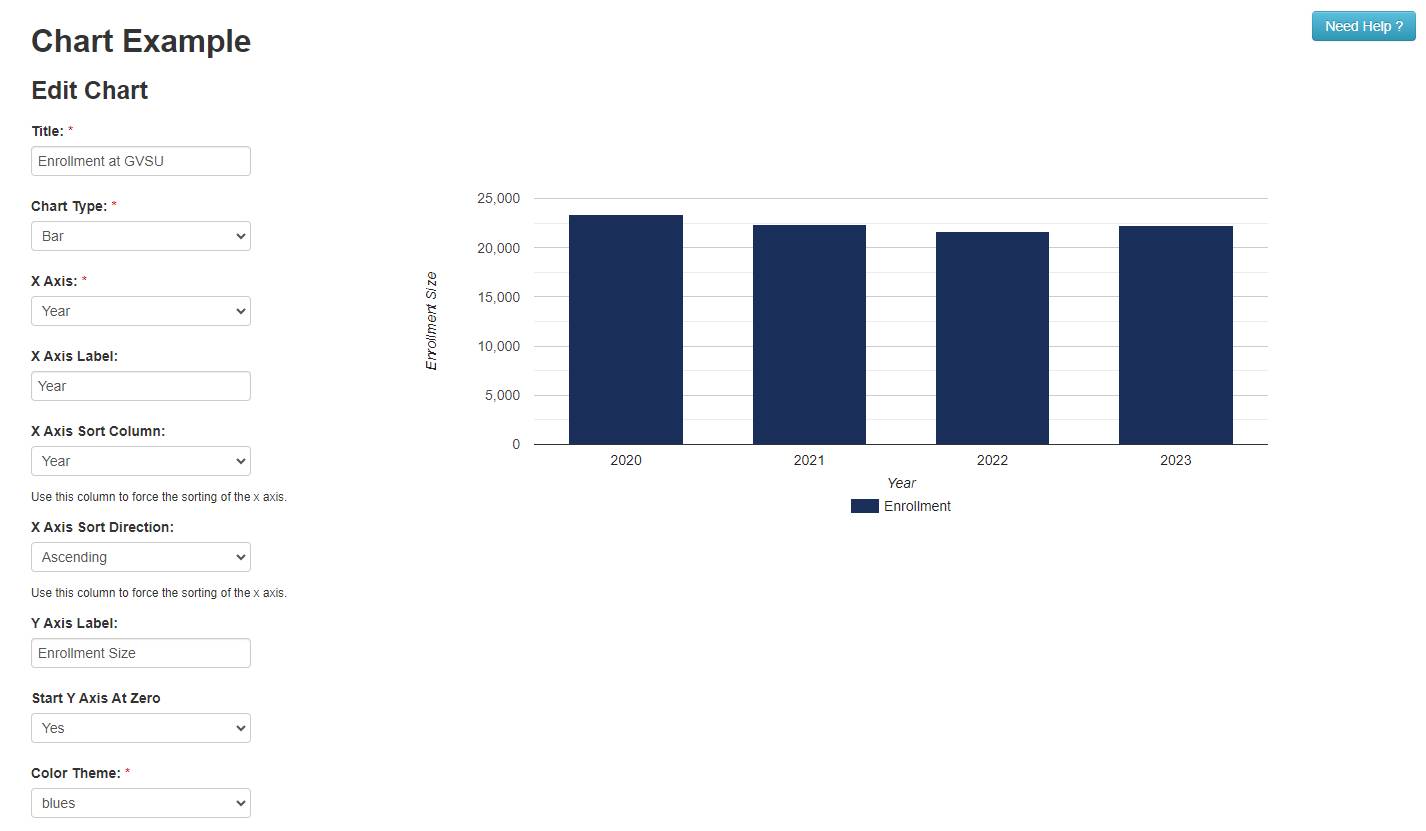
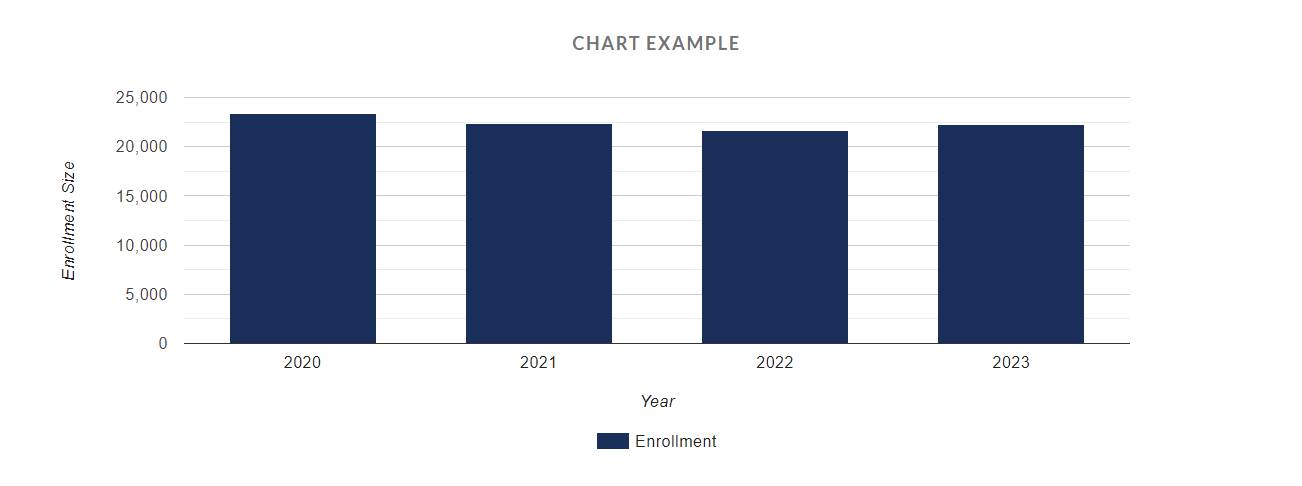
In addition to a list, in the list module you can also create charts from the series of information you input:
- Follow the steps above to add in the data you want to show in your chart by creating a list.
- Once the data points are correct in the list you have either created within the CMS or uploaded as a separate file, click the Charts button.
- Click the green Add New Chart button.
- Give your chart a title.
- Select what type of chart you want (this can be changed at anytime).
- Select the data from your list that will be on the X-axis.
- Give the X-axis a label (optional).
- Select how the X-axis will be sorted from your list.
- Select whether the X-axis will be sorted by ascending or descending.
- Give the Y-axis a label (optional).
- Select whether the Y-axis will start at 0 or not.
- Select a color theme from the available options in the drop down menu.
- Click the green Add New Series button to add data to your chart.
- Select the column from the list you have created above.
- Give your data series a title so users know which data is which.
- Repeat steps 13-15 for each data series in the chart.
- Click Save when finished.
Adding the module to a content page:
- Click edit on the page you want to add the module to.
- Click manage modules from the toolbar on the right.
- Select the list module you created in the steps above.
- Drag the list module to its desired location on the page, and resize if needed.
- Click edit on the module to adjust the following display settings:
- Show or hide the accordion module heading.
- Select Chart as the layout for your list module.
- Select the chart you want displayed.
Back-End Example (Chart)
Front-End Example (Chart)
News
What is it?
A module that you can add stories to that displays the stories similarly to the blog module.
When should I use it?
A news module serves to promptly inform website visitors about time-sensitive information, such as news updates, contrasting with a blog that may feature content less reliant on immediate relevance.
How do I create one?
- Click + New Module and select news.
- Give your module a name if desired.
- Click + Add Story.
- Add a title to your story.
- Select the date for publishing the story.
- Add an image to the story (optional).
- Add a introduction to the story (this will be shown before a user clicks to read the full story).
- Add your news story to the text box under Content.
- Click Submit when done.
- Repeat steps 2-8 for additional stories.
Adding the module to a content page:
- Click edit on the page you want to add the module to.
- Click manage modules from the toolbar on the right.
- Select the news module you created in the steps above.
- Drag the news module to its desired location on the page, and resize if needed.
- Click edit on the module to adjust the following display settings:
- Show or hide the news module heading.
- Select the number of stories to display.
- Select whether to display the short descriptions.
- Select if you want the news images to be displayed.
- Add a highlight of blue or gray if desired.
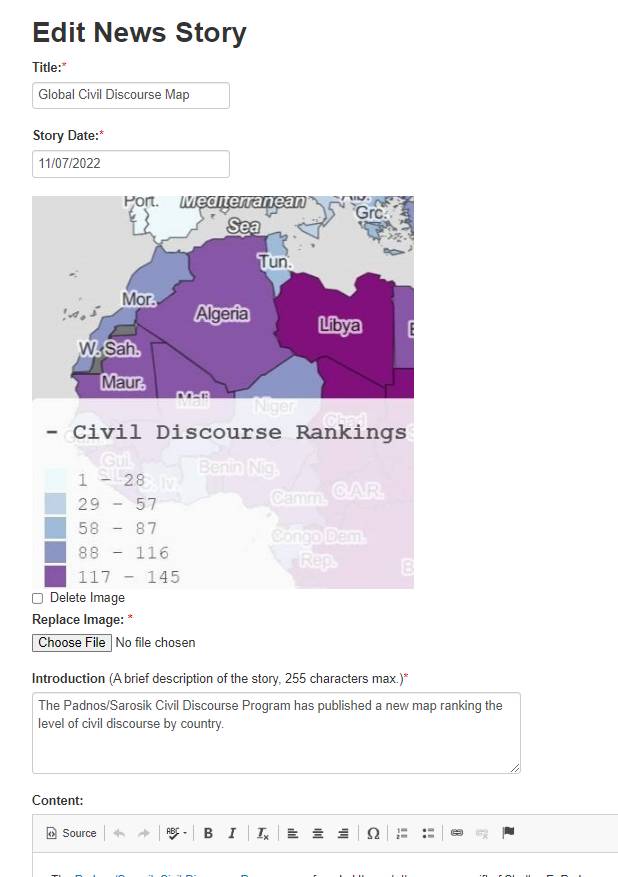
Back-End Example
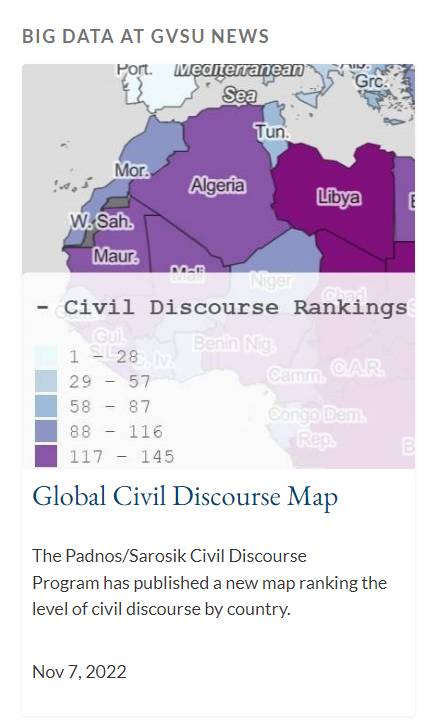
Front-End Example
Office Hours
What is it?
A calendar for visitors to use to see a professor's office hours availability.
When should I use it?
To create a easily accessible calendar of a department's available office hours for students to find.
How do I create one?
- Click + New Module and select office hours.
- Give your module a name if desired.
To manually create a office hours calendar:
- Click + Add New User.
- Fill in the contact information for the user whose office hours will be displayed in the module.
- Click Save.
- Repeat steps 2-4 for each additional user.
- Click Semesters.
- Click + Add New Semester.
- Fill in the start and end date information for the semester for the specific office hours.
- Click Save.
- Repeat steps 7-9 for each additional semester.
- Click Manage Schedule on the user whose office hours you want to input.
- Click + Add New Item.
- Fill in the following office hours information for when they will take place.
- Click Save.
- Repeat steps 11-14 for each additional user's schedule.
To input your calendar from Banner:
- Click Import.
- Select create from Banner Semester.
- Select the semester from Banner to import.
- Enter the subject code from Banner.
- Select the office hour calendar color.
Adding the module to a content page:
The office hours module works a little differently than our other modules. To add a user's office hour calendar to a page on your site:
- Click View on a user.
- Copy the URL from the calendar page.
- Hyperlink the URL to accessibility friendly text on the page you want the calendar linked to.
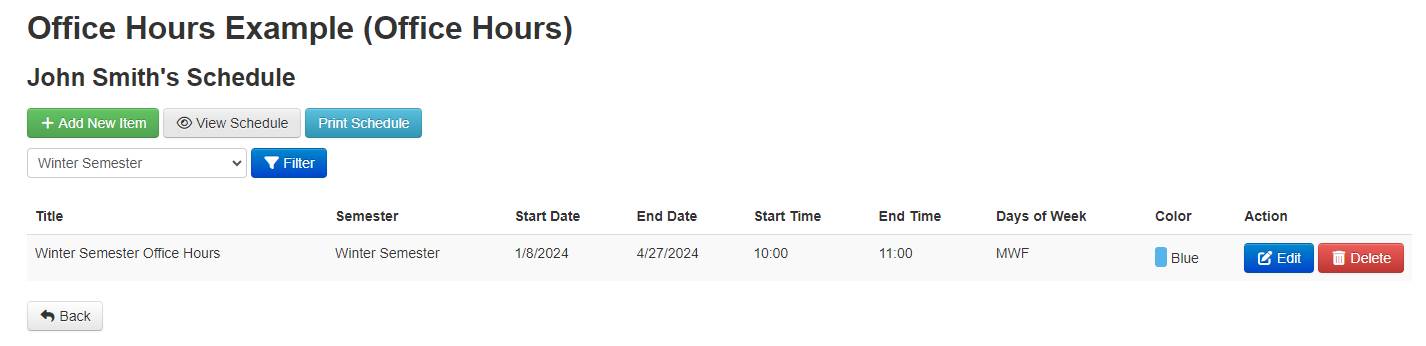
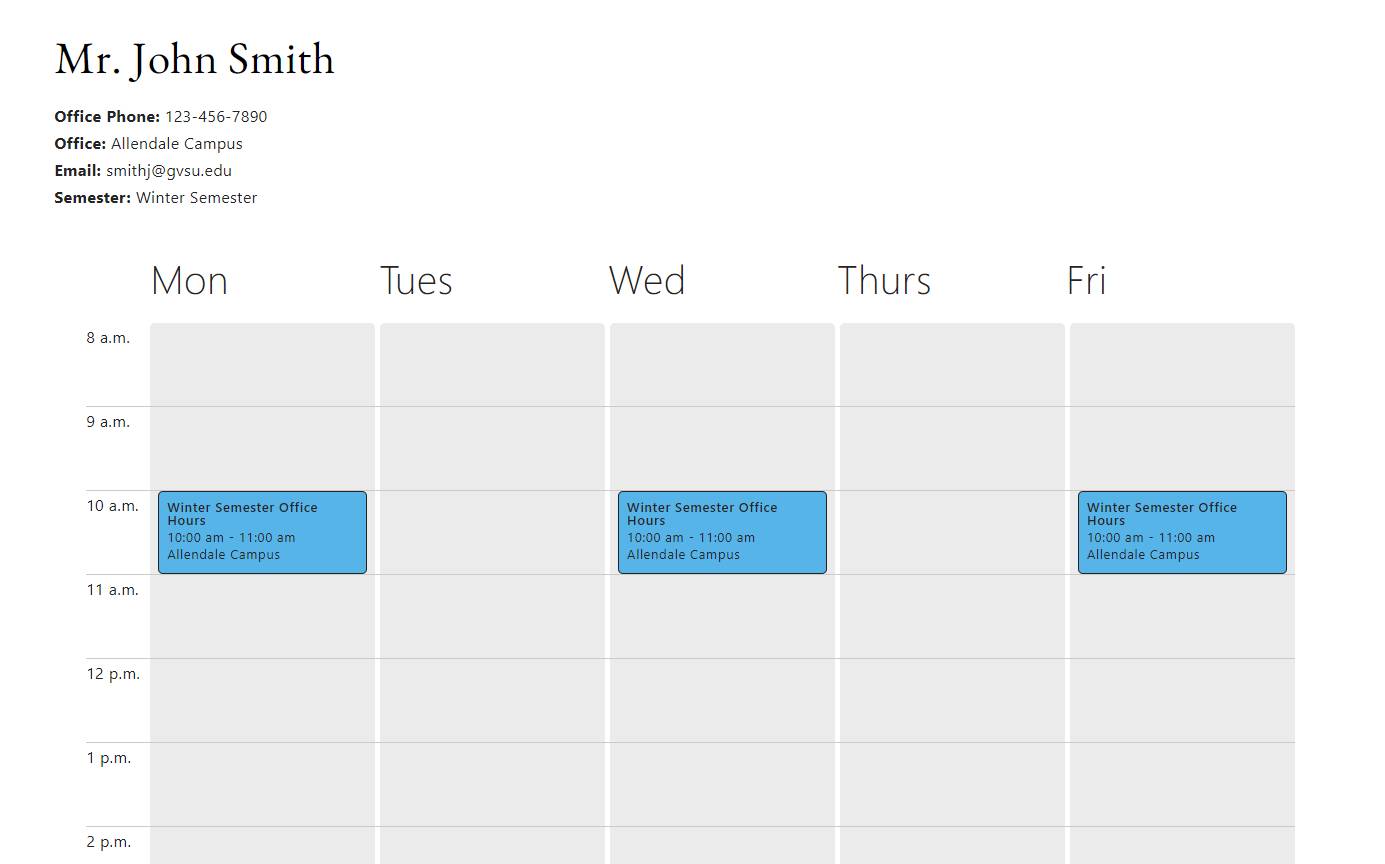
Back-End Example
Front-End Example
Organization Chart
What is it?
A module that visually represents the structure of an department or organization.
When should I use it?
When you want share with your audience how your department or organization is structured.
How do I create one?
- Click + New Module and select organization chart.
- Give your module a name if desired.
- Click + Add Entry.
- Fill in the first/last name and title of the entry.
- For the first entry there will be No Parent (1st Node). For the following entries you will select who the parent entry will be in the last box. A manager would be the parent entry to their employee.
- Repeat steps 2-4 for additional entries.
Adding the module to a content page:
The organization chart module works a little differently than our other modules. To add a the organization chart to a page on your site:
- In the left hand menu in the CMS click the Preview button (magnifying glass) for your organization chart module.
- Copy the URL from the organization chart page.
- Hyperlink the URL to accessibility friendly text on the page you want the organization chart linked to.
- Additionally, you can add your organization chart to the navigation menu of your website. You can learn more about setting up your site's navigation in our Navigation Menu guide.
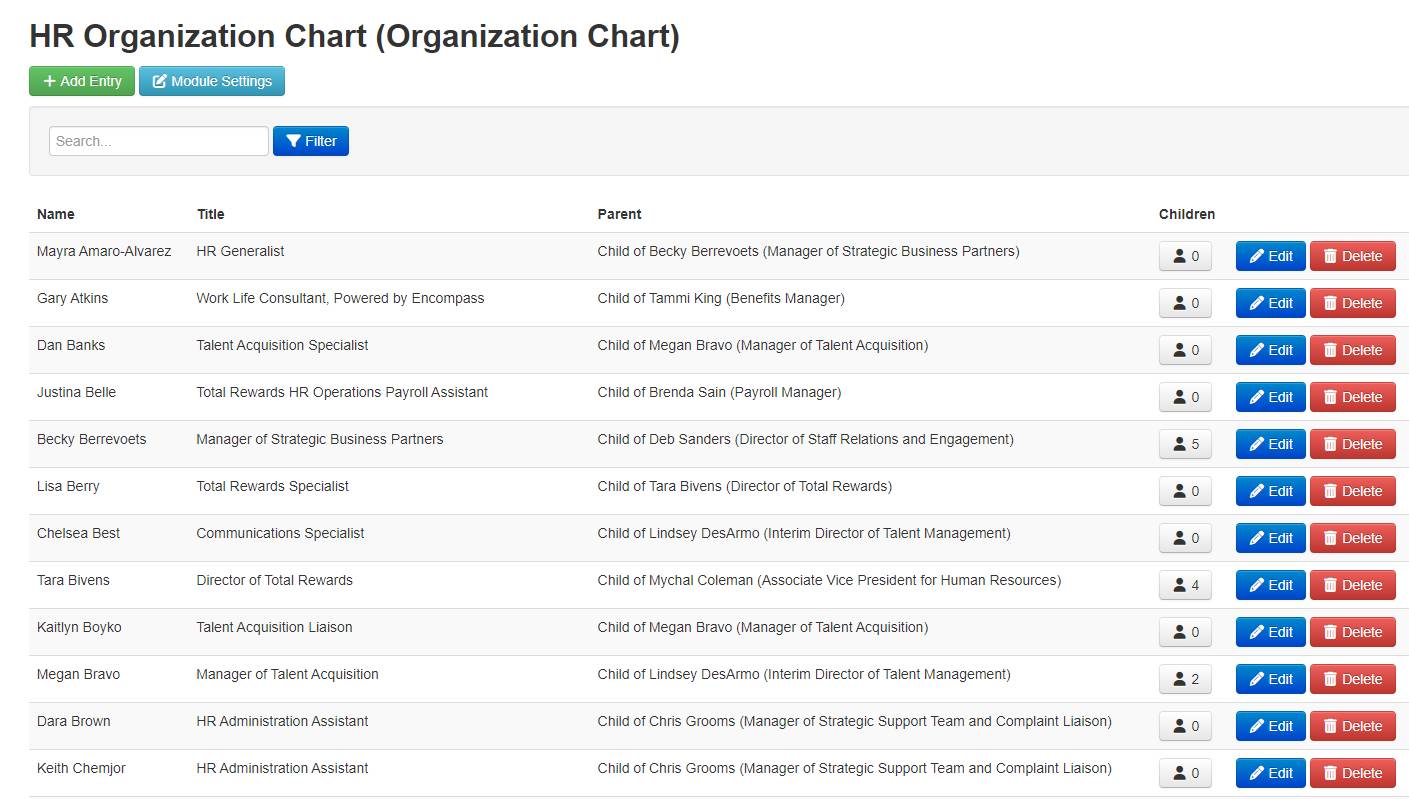
Back-End Example
Front-End Example
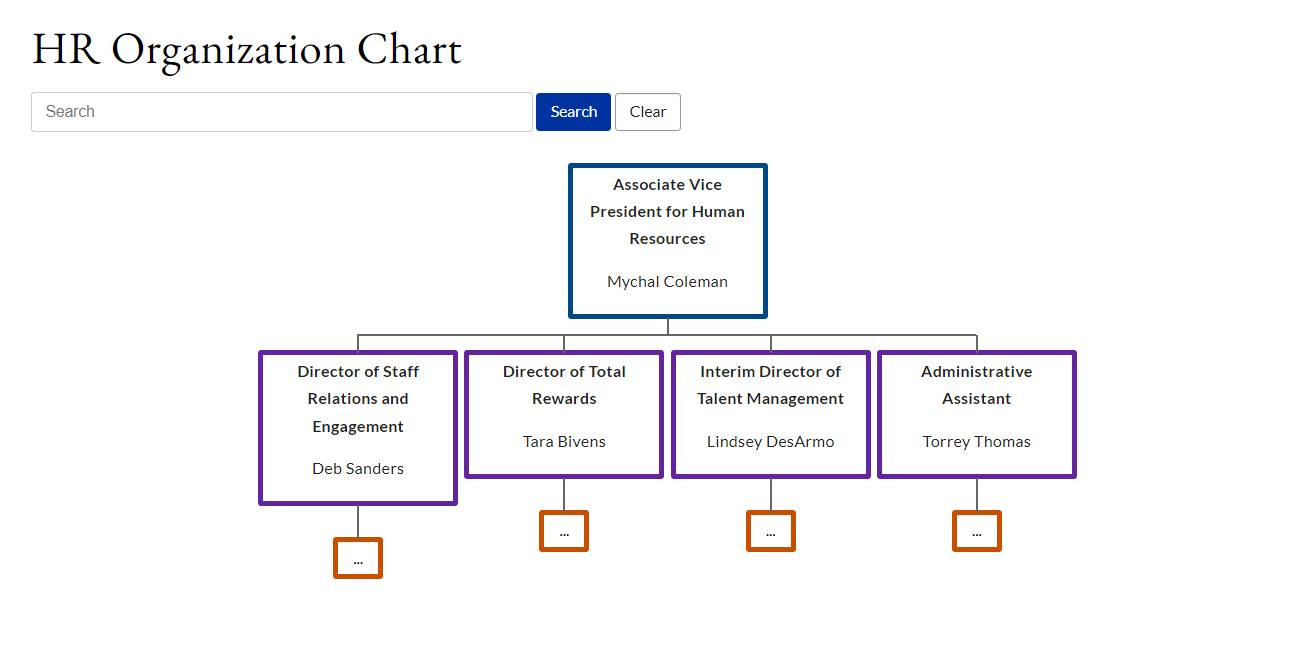
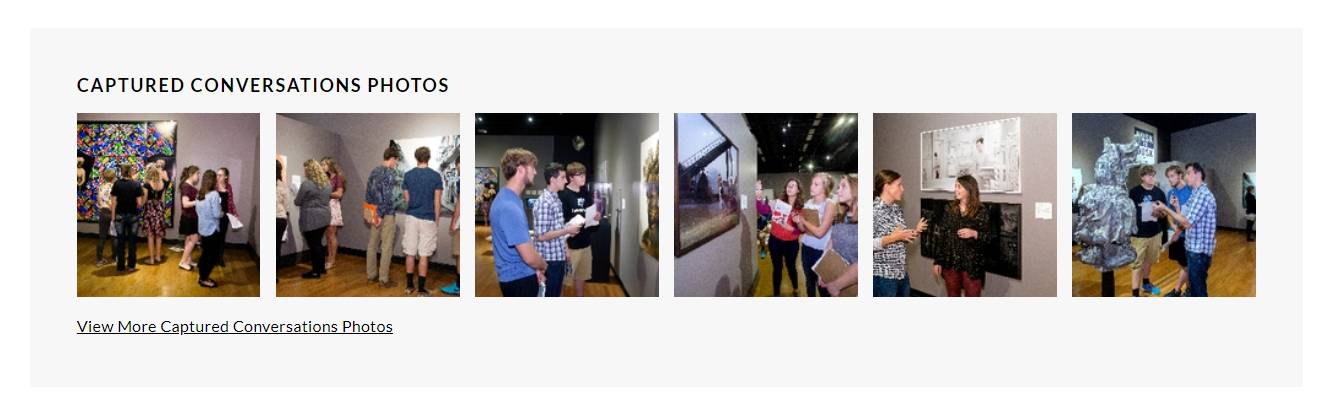
Photo Gallery
What is it?
A module that allows a user to share photos in a single collection.
When should I use it?
You should use the photo gallery when you want to show case photos from a portfolio, event, etc.
How do I create one?
- Click + New Module and select photo gallery.
- Give your module a name if desired.
- Click + Add Gallery.
- Give your gallery a title.
- Add a description to your gallery (optional).
- Select whether to include a link to other galleries on this gallery (recommended).
- Select whether to display this galley in the list of galleries on your site (recommended).
- Select whether you want the gallery to be above or below other galleries.
- To add photos to your gallery, click Photos.
- Click + Add Photos.
- Click Choose Files.
- Provide a title (optional), alt text (required), and description (optional) for your photo.
- Repeat steps 9-11 for additional photos.
- When all photos have been uploaded, you can rearrange the order of your photos by clicking Arrange Photos.
- Click Submit when finished.
- Repeat steps 2-14 for additional galleries.
Adding the module to a content page:
- Click edit on the page you want to add the module to.
- Click manage modules from the toolbar on the right.
- Select the photo gallery module you created in the steps above.
- Drag the photo gallery module to its desired location on the page, and resize if needed.
- Click edit on the module to adjust the following display settings:
- Show or hide the module heading.
- Show or hide the module description.
- Select what gallery you want to display.
- Select how you want the gallery to display the images on the page.
- Add a highlight of blue or gray if desired.
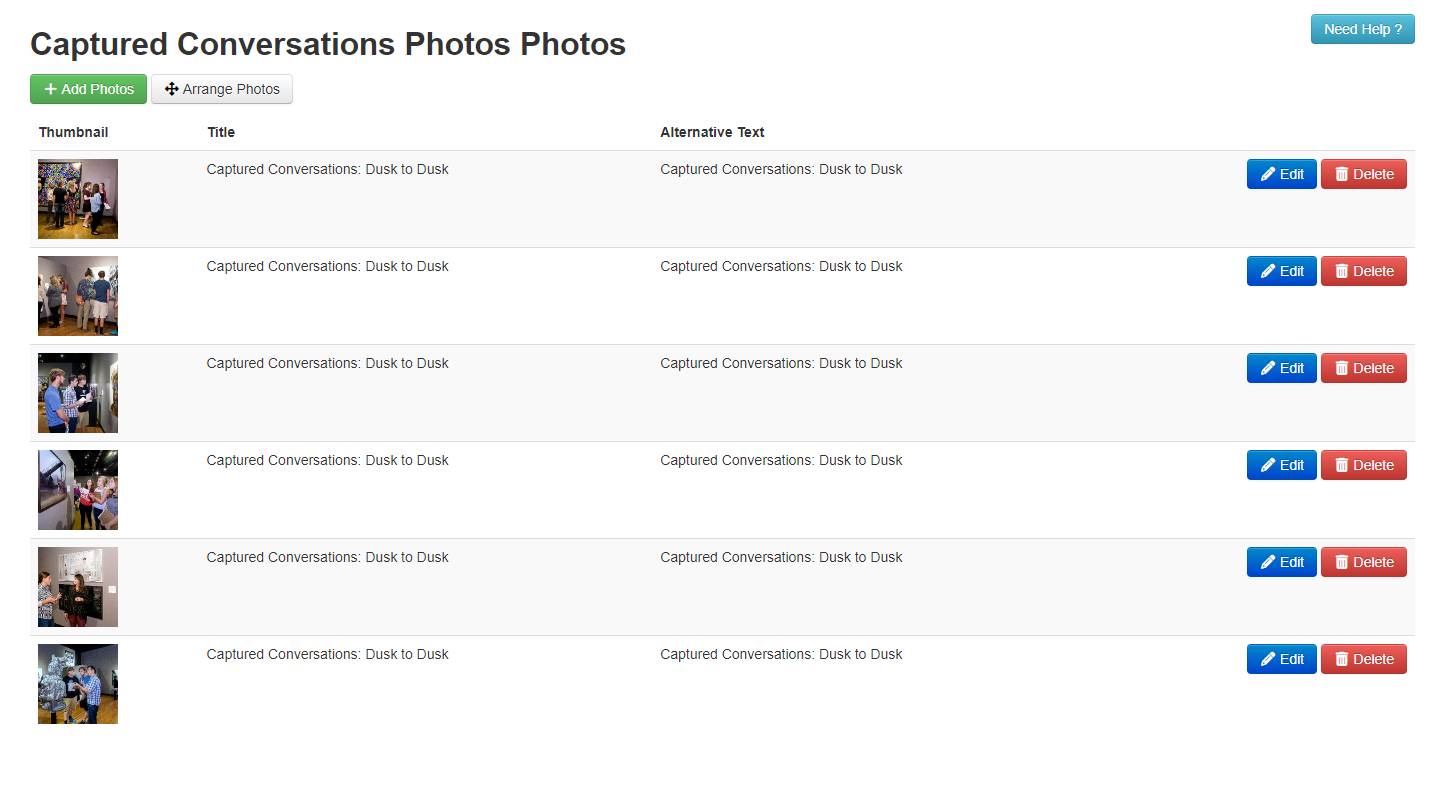
Back-End Example
Front-End Example
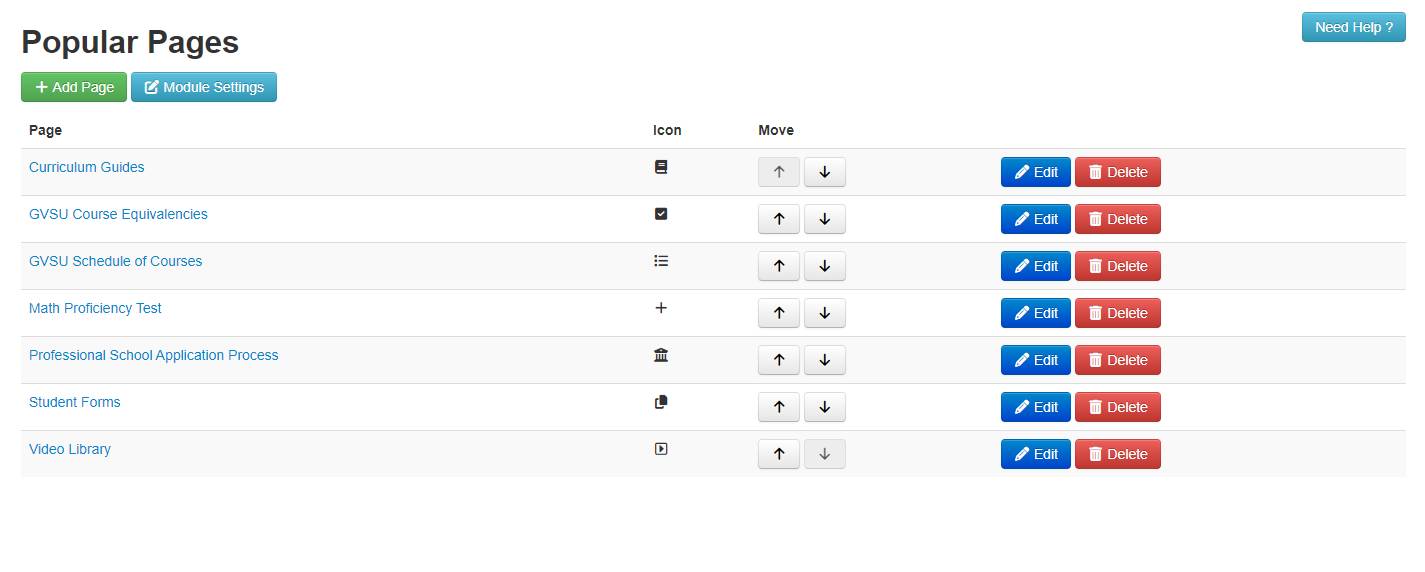
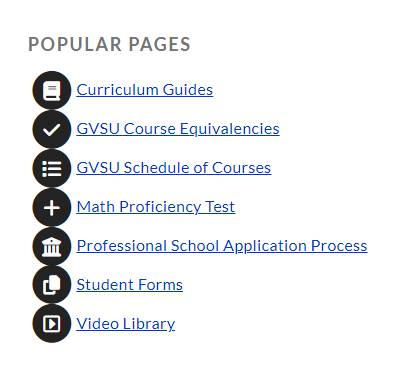
Popular Pages
What is it?
A formatted section that allows you to highlight specific pages for visitors to easily navigate to.
When should I use it?
If you have specific pages or resources that most visitors to your site view, you can group them together in this module.
How do I create one?
- Click + New Module and select popular pages.
- Give your module a name if desired.
- Click + Add Page.
- Add a title to the popular page.
- Select the link to send traffic to:
- An external website
- A file in your sites File Manager
- Your site's index
- A protected file
- An existing page within your site
- Select whether the link will open in the same or new tab.
- Select whether to show an icon or not next to the link.
- Click Submit.
- Repeat steps 2-7 for additional popular pages.
Adding the module to a content page:
- Click edit on the page you want to add the module to.
- Click manage modules from the toolbar on the right.
- Select the popular pages module you created in the steps above.
- Drag the popular pages module to its desired location on the page, and resize if needed.
- Click edit on the module to adjust the following display settings:
- Show or hide the accordion module heading.
- Add a highlight of blue or gray if desired.
Back-End Example
Front-End Example
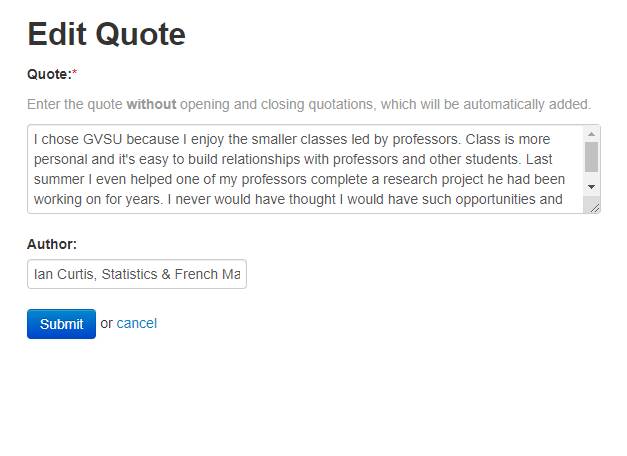
Pull Quotes
What is it?
A module that formats a quote in a different style than the rest of the page's text to make it stand out or break up a page.
When should I use it?
When you want to draw a visitor's attention to a specific quote relevant to the content on the page.
How do I create one?
- Click + New Module and select pull quote.
- Give your module a name if desired.
- Click + Add Quote.
- Add the quote to the text box without quotation marks.
- Add the author of the quote.
- Click submit when done.
- Repeat steps 2-5 for additional quotes.
Adding the module to a content page:
- Click edit on the page you want to add the module to.
- Click manage modules from the toolbar on the right.
- Select the pull quote module you created in the steps above.
- Drag the pull quote module to its desired location on the page, and resize if needed.
Back-End Example
Front-End Example

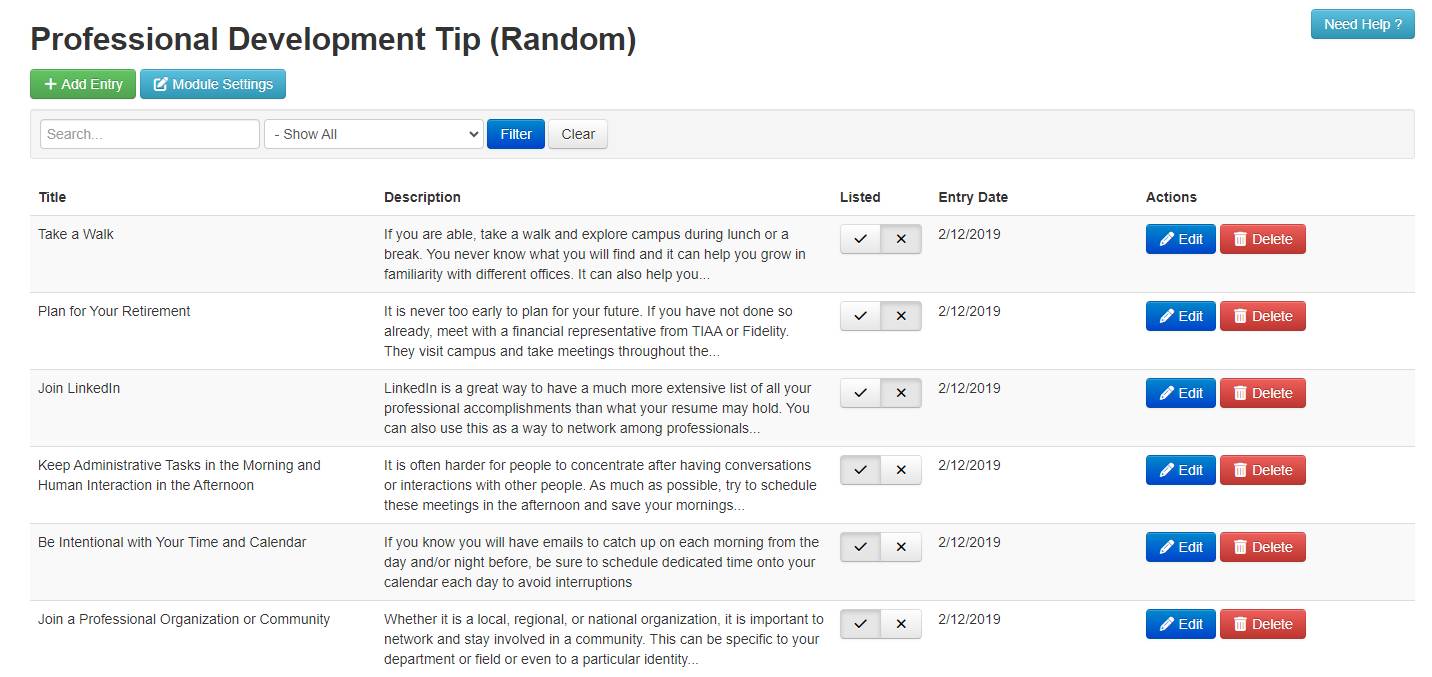
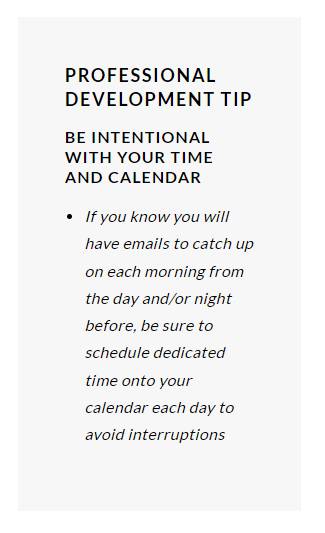
Random
What is it?
A module that generates a random premade section of text every time the page is loaded.
When should I use it?
To share out information or content to your visitors on a random frequency but at the same location on a specific page.
How do I create one?
- Click + New Module and select random.
- Give your module a name if desired.
- Click + Add Entry.
- Add a title to your entry.
- Add the content you want displayed under the description.
- Click submit when done.
- Repeat steps 2-5 for additional entries.
Adding the module to a content page:
- Click edit on the page you want to add the module to.
- Click manage modules from the toolbar on the right.
- Select the random module you created in the steps above.
- Drag the random module to its desired location on the page, and resize if needed.
- Click edit on the module to adjust the following display settings:
- Show or hide the module heading.
- Select how many entries to display at once.
- Add a highlight of blue or gray if desired.
Back-End Example
Front-End Example
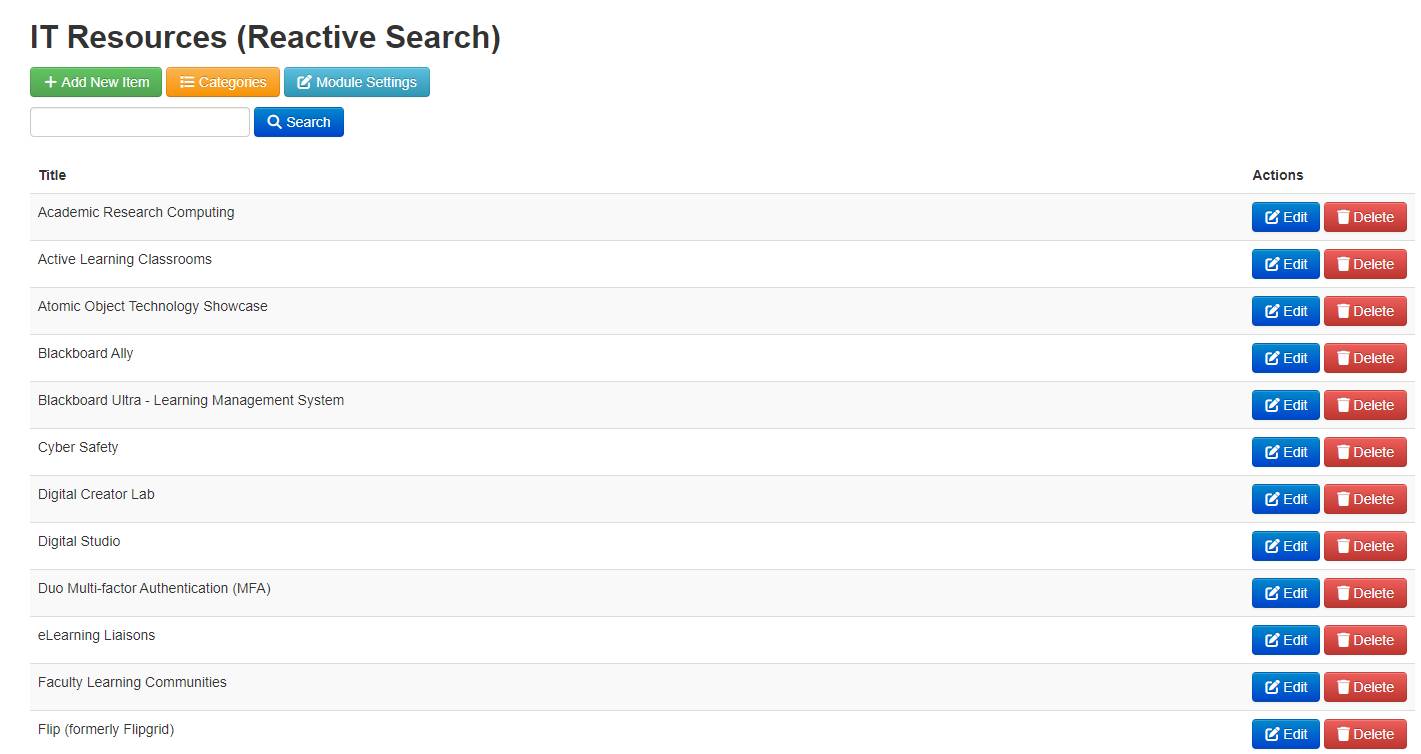
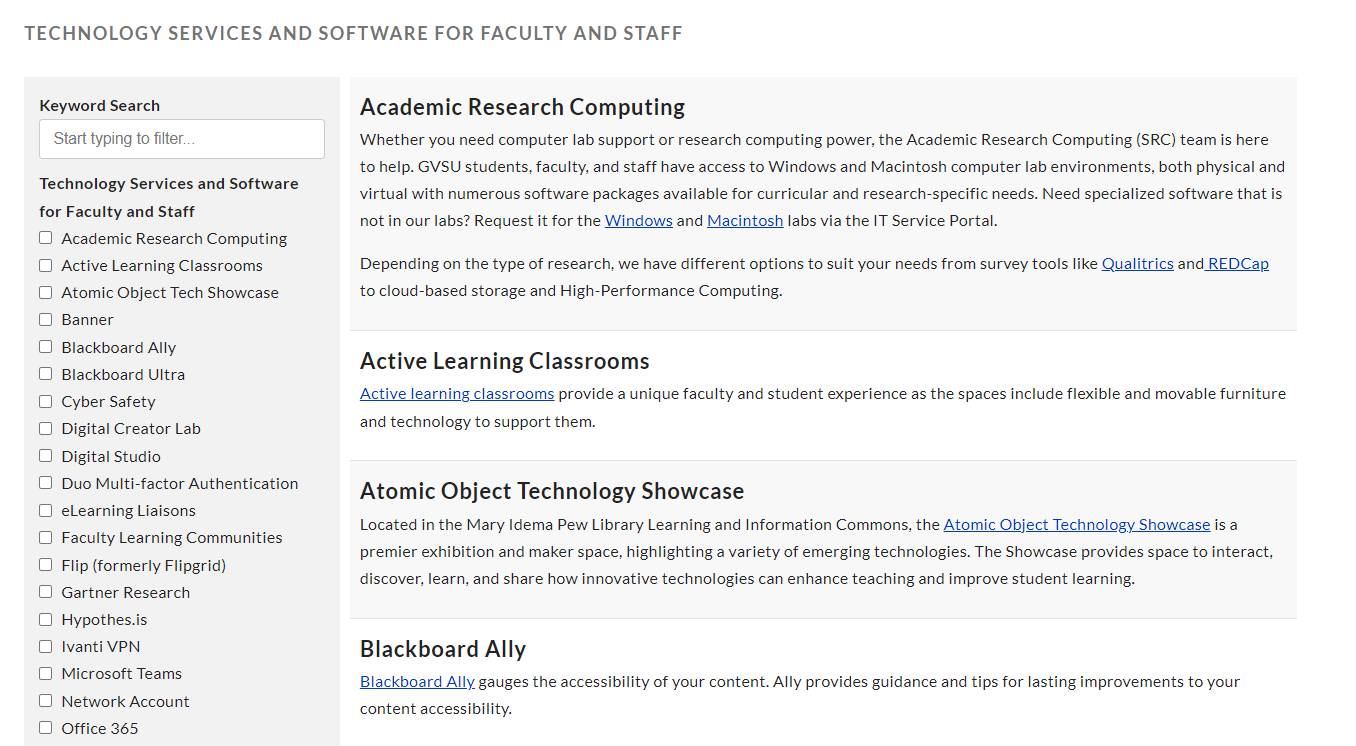
Reactive Search
What is it?
A collection of information blurbs that a user can use a search filter to find the relevant information they are looking for.
When should I use it?
When you have a large amount of resources and information to share with your audience that can be broken into similar topic groups.
How do I create one?
- Click + New Module and select reactive search.
- Give your module a name if desired.
- Click Categories.
- Click + Add New Category.
- Add a title to the category.
- Click Save.
- Repeat steps 2-5 for all categories.
- Click + Add New Item.
- Add a title to the item.
- Add the content of the item in the text box.
- Select the category you made in the steps above that the item belongs to.
- Click Save.
- Repeat steps 7-11 for all items.
Adding the module to a content page:
- Click edit on the page you want to add the module to.
- Click manage modules from the toolbar on the right.
- Select the reactive search module you created in the steps above.
- Drag the reactive search module to its desired location on the page, and resize if needed.
Back-End Example
Front-End Example
Spotlight
What is it?
A module that lets you create a list of pieces of content with images & text to highlight on your page.
When should I use it?
You could use the spotlight module to feature staff members, programs, research, events, etc. Use this module when you have a collection of similar pieces of content you want to spotlight.
How do I create one?
- Click + New Module and select spotlight.
- Give your module a name if desired.
- Click + Add Spotlight.
- Add a title.
- Add an image (optional).
- Add a introduction (255 characters max).
- Select whether this spotlight will be listed (viewable) in the module or not.
- Add the content of the spotlight in the text box.
- Click submit when done.
- Repeat steps 2-8 for additional spotlights.
Adding the module to a content page:
- Click edit on the page you want to add the module to.
- Click manage modules from the toolbar on the right.
- Select the spotlight module you created in the steps above.
- Drag the spotlight module to its desired location on the page, and resize if needed.
- Click edit on the module to adjust the following display settings:
- Show or hide the module heading.
- Select how many spotlights you want to display at once.
- Select whether the spotlight descriptions will display or not.
- Select whether the spotlight images will display or not.
- Add a highlight of blue or gray if desired.
Back-End Example
[1711049303].jpg)
Front-End Example
[1711049303].jpg)
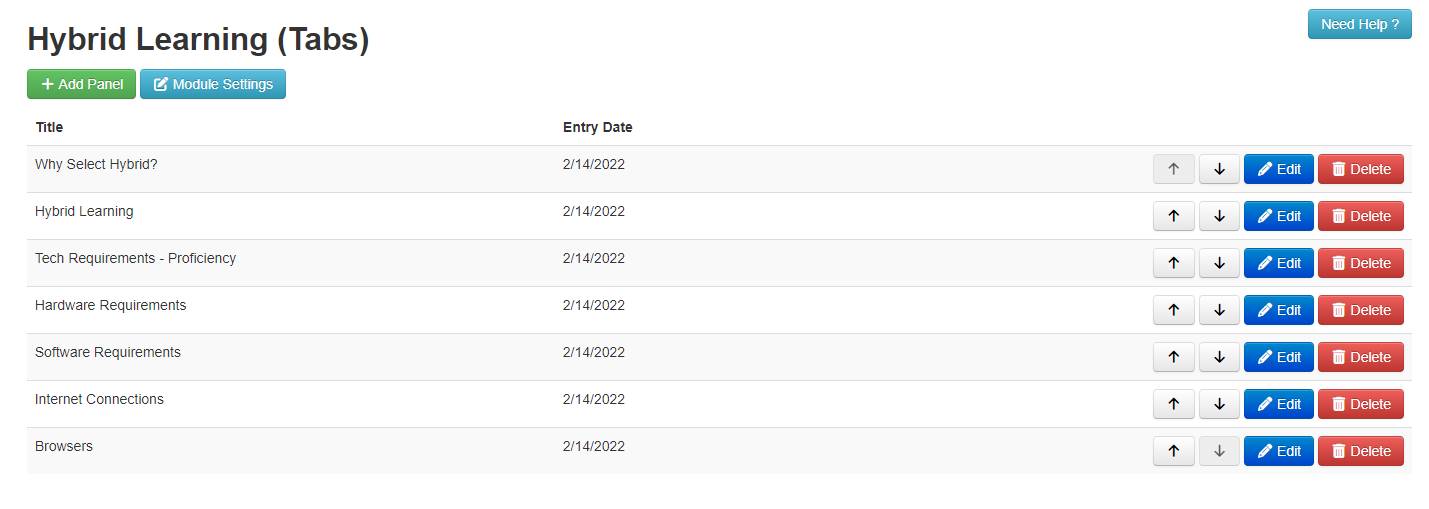
Tabs
What is it?
Similar to the accordion module, the tab module allows a user to add panels to a section to allow each panel (tab) to be focused on different content.
When should I use it?
A good use of this module is when you have a lot of information to share about a specific topic that can be broken down into sub-topics. Each sub-topic can be its own tab in the module.
How do I create one?
- Click + New Module and select tabs.
- Give your module a name if desired.
- Click + Add Panel.
- Add a title to your panel.
- Add the content for the panel in the text box.
- Click submit when done.
- Repeat steps 2-5 for additional tabs.
Adding the module to a content page:
- Click edit on the page you want to add the module to.
- Click manage modules from the toolbar on the right.
- Select the tab module you created in the steps above.
- Drag the tab module to its desired location on the page, and resize if needed.
- Click edit on the module to select which tabs you want to display.
Back-End Example
Front-End Example
