Chunks Overview
In the CMS, each page has different building blocks called chunks that you can easily use to create your web pages. Read through the guide below to understand what each chunk does, when to use it, and how to add it to your page. You can use the menu for quick navigation to a specific chunk or scroll through to see all the available options.
Jump to a specific chunk
Chunks
Heading
What is it?
A heading on a webpage is like a signpost that tells you what each section is about, making it easier to find and understand different parts of the content.
When should I use it?
Use headings on a webpage whenever you want to organize information into distinct sections, making it clearer for visitors to navigate and comprehend your content.
How do I create one?
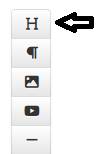
- Open up the content page you want to add a heading too.
- Click on the "H" icon (see the image to the right).
- Drag the chunk to its desired location on the page, and resize if needed.
- Type your heading in the heading chunk.
- Select between heading options <H1>, <H2>, <H3> (You should only have 1 H1 heading per page).
Back-End Example

Front-End Example
[1711049303].jpg)
Paragraph
What is it?
A paragraph chunk on a webpage is a block of text that's grouped together, helping to organize and present information in a readable way.
When should I use it?
Use a paragraph chunk when drafting a webpage to present a single idea or piece of information in a cohesive manner, making your content more structured and easy for readers to follow (a paragraph chunk can contain multiple paragraphs).
How do I create one?
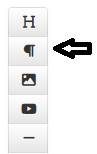
- Open up the content page you want to add a paragraph to.
- Click on the "P" icon (see the image to the right)
- Drag the chunk to its desired location on the page, and resize if needed.
- Add a heading (optional) to the top of your paragraph chunk
- Add the text you want to display in the content box. Use the editing tools to format your text (bold, italicize, bullets, etc.).
- Under more options you can:
- Center align your text
- Highlight your paragraph with a blue or gray background.
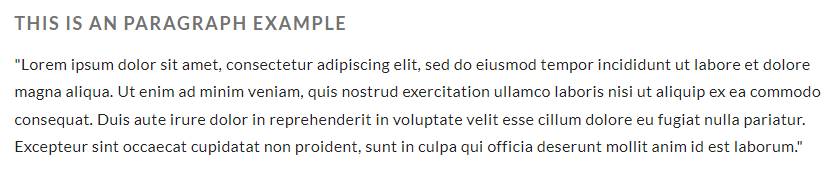
Back-End Example
[1711049303].jpg)
Front-End Example
Image
What is it?
An image chunk in an CMS page is a visual element, such as a photo or illustration.
When should I use it?
Use an image chunk when drafting a webpage to visually enhance your content, making it more appealing and helping to convey information in a way that words alone might not achieve.
How do I create one?
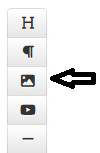
- Open up the content page you want to add a image to.
- Click on the "picture" icon (see the image to the right).
- Drag the chunk to its desired location on the page, and resize if needed.
- Add a heading (optional) to the top of image.
- To add your image select File Manager
- If the image has already been uploaded, find and select the image under File Manager
- If the image has not been uploaded, click the upload tab at the top
- Select Choose File to upload your image
- Add tags before uploading (optional)
- Click on Upload
- Add a title/alternative text. This is required, you can learn more on our Accessibility Website.
- Add a URL to the image (optional).
- Change whether the URL will open in a new tab, new browser, or the current tab under Target.
- Add a caption to your image using the text box.
- Add styling to your caption by selecting More Options.
Back-End Example
[1711049303].jpg)
Front-End Example
[1711049303].jpg)
Video
What is it?
A video chunk allows a user to embed a video into a web page, allowing for seamless playback and control within the browser.
When should I use it?
Use the video chunk when you want to incorporate specific segments or portions of a video into your web page, providing targeted and relevant content to enhance user engagement.
How do I create one?
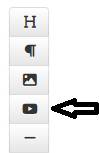
- Open up the content page you want to add a video to.
- Click on the "play button" icon (see the image to the right).
- Drag the chunk to its desired location on the page, and resize if needed.
- Add a heading (optional) to the top of your video chunk.
- Add a Title/Alternative Text.
- Add the link to your video from one of the compatible video hosting websites.
- Add an optional caption to your video.
Back-End Example
[1711049303].jpg)
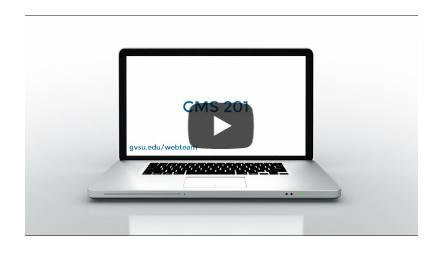
Front-End Example
Horizontal Rule (Line)
What is it?
A Horizontal Rule (Line) is a line that stretches across a webpage.
When should I use it?
Use the Horizontal Rule when you want to visually divide your webpage into sections, create a break between different parts, or make it easier to read and organize.
How do I create one?
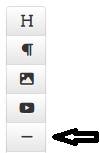
- Open up the content page you want to add a horizontal line to.
- Click on the "line" icon (see the image to the right).
- Drag the chunk to its desired location on the page.
- Place the line in the row where you want a divider.
Back-End Example

Front-End Example

Anchor
What is it?
A anchor allows users to create links to specific sections of a webpage vs. a general link to the top of the page.
When should I use it?
Use an anchor when you want to link to specific sections or points within a single webpage, providing a user-friendly and organized browsing experience.
How do I create one?
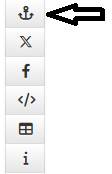
- Open up the content page you want to add a anchor line to.
- Click on the "anchor" icon (see the image to the right).
- Drag the chunk to its desired location on the page, and resize if needed.
- Place the anchor in the row where you want to link to.
- Add a name to your anchor
How can I link to the anchor?
When sharing the link to your webpage, you can add in your #anchor tag at the end of the URL to have the link load directly to that section.
Back-End Example
[1711049303].jpg)
Front-End Example
In a webpage, anchors are behind-the-scenes elements. For instance, on this page we are using anchors in each of the Back to the Top buttons to help quickly go back to the top menu.
What is it?
A Facebook chunk allows you to embed a Facebook page's timeline, events, or messages.
When should I use it?
Use the Facebook chunk when you want users to view your Facebook content without redirecting them to Facebook's platform.
How do I create one?
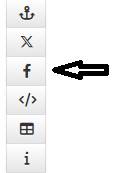
- Open up the content page you want to add a Facebook chunk to.
- Click on the "Facebook" icon (see the image to the right).
- Drag the chunk to its desired location on the page, and resize if needed.
- Show or hide the heading.
- Enter the URL of the Facebook page you want to embed.
- Select the types of content from Facebook you want to feature.
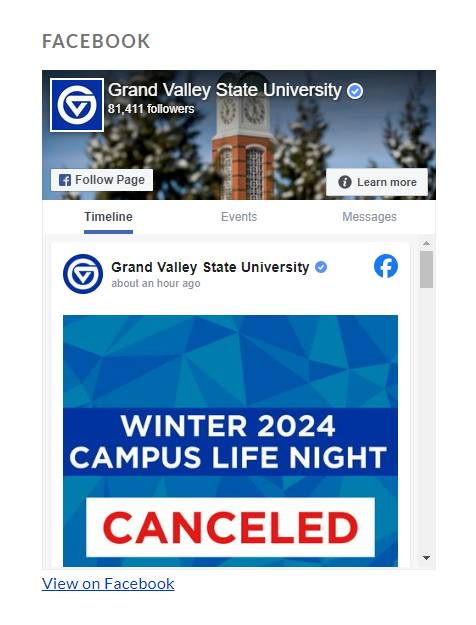
Back-End Example
[1711049303].jpg)
Front-End Example
Table
What is it?
A chunk that allows a user to place a table on a webpage.
When should I use it?
Use the table chunk when you want to organize and present information to your audience in a structured format.
How do I create one?
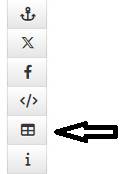
- Open up the content page you want to add a table chunk to.
- Click on the "table" icon (see the image to the right).
- Drag the chunk to its desired location on the page, and resize if needed.
- Add a heading to your table (optional).
- Move a row (up/down) or column (left/right) by clicking on the blue directional arrows.
- Delete a row or column by clicking on the red trash can button.
- Edit the text in each row and column by clicking on the generated text box.
- Add additional rows or columns by clicking the green +Add Row or +Add Column buttons.
- Choose whether the columns width will be evenly distributed or automatically distributed based on the amount of text in a cell.
- Change the color of the top row of the table by selecting from the available options.
Back-End Example
[1711049303].jpg)
Front-End Example

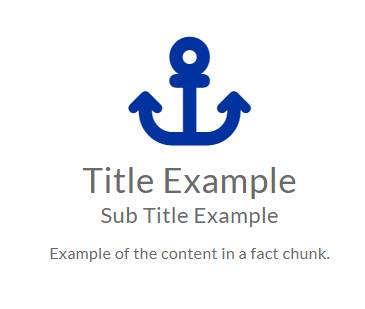
Fact
What is it?
A distinctive element that allows admins to highlight specific information through custom imagery and formatting.
When should I use it?
Use the fact icon to captivate the user's focus on a particular piece of information; additionally, a fact chunk serves to diversify the webpage formatting beyond mere text and bullet points.
How do I create one?
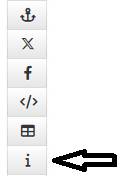
- Open up the content page you want to add a fact chunk to.
- Click on the "i" icon (see the image to the right).
- Drag the chunk to its desired location on the page, and resize if needed.
- Select the icon you want assigned to your fact.
- Choose the icon's color from the list of available colors.
- Add additional optional text to your fact by filling in the title, sub title, & content sections.
- Choose how you want the content to be displayed.
- Visible under your title and sub-title.
- Hidden until a user places their mouse over the fact icon, which then reveals the content you've added.
- Add a link to the fact by placing a URL in the box.
Back-End Example
[1711049303].jpg)
Front-End Example
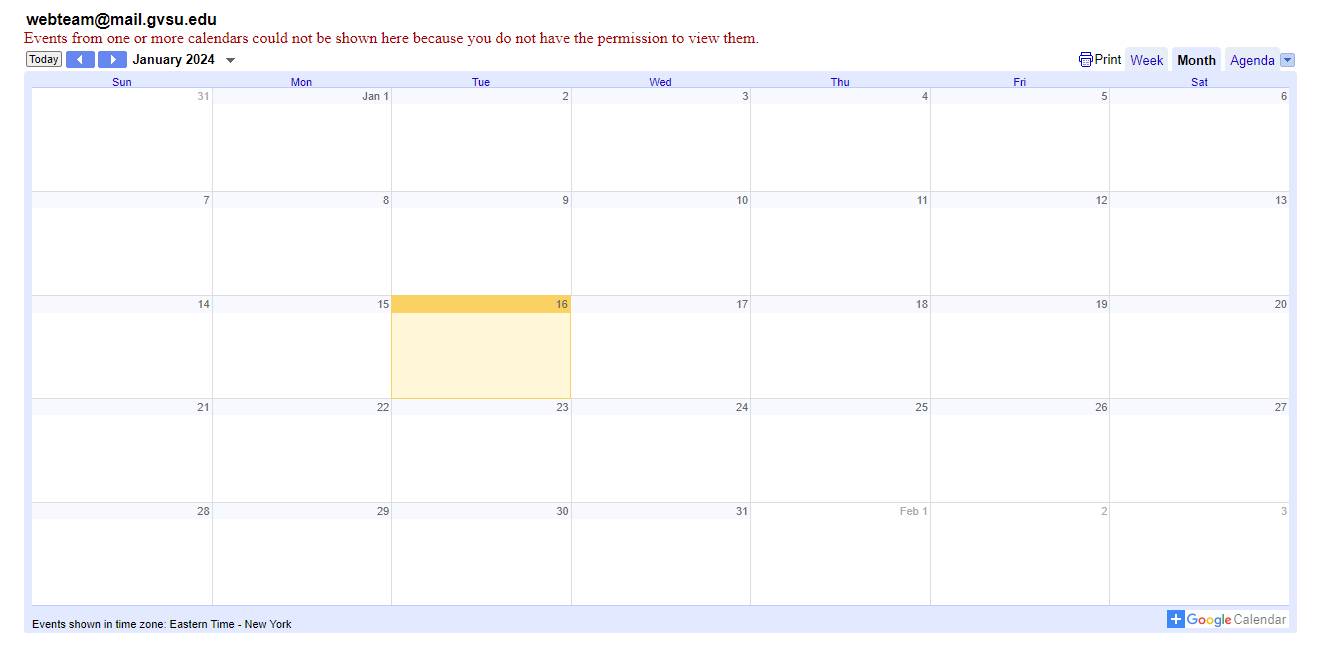
Google Calendar
What is it?
The Google Calendar chunk lets you easily show your Google Calendar events on a webpage, making it simple for people to see your schedule.
When should I use it?
Use the Google Calendar chunk when you want to share your department's schedule or upcoming events on a webpage in a user-friendly and visually appealing manner.
How do I create one?
- Open up the content page you want to add a Google Calendar chunk to.
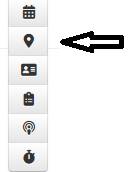
- Click on the "calendar" icon (see the image to the right).
- Drag the chunk to its desired location on the page, and resize if needed.
- Add a heading (optional) to the calendar chunk.
- Add the embedded code from the Google Calendar you want to feature. If you're not sure where to find this code, click on the blue help button to see directions on where to find it.
- Add a brief description about the calendar.
- Adjust the height of your calendar to your preference.
Back-End Example
[1711049303].jpg)
Front-End Example
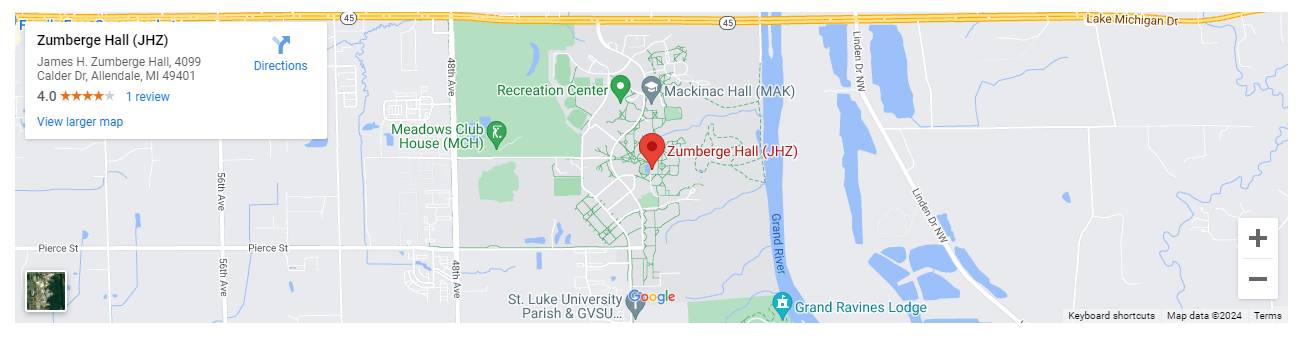
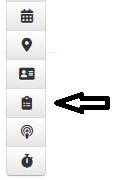
Google Map
What is it?
The Google Map chunk embeds an interactive Google Map into a webpage, allowing users to view and interact with location-based information.
When should I use it?
Use the Google Map chunk when you want to embed an interactive map on your webpage to help users easily locate and navigate to a specific location.
How do I create one?
- Open up the content page you want to add a Google Map chunk to.
- Click on the "map pin" icon (see the image to the right).
- Drag the chunk to its desired location on the page, and resize if needed.
- Add a heading (optional) to the map chunk.
- Add the embedded code from the Google Map you want to feature. If you're not sure where to find this code, click on the blue help button to see directions on where to find it.
- Add a brief description about the calendar.
- Adjust the height of your calendar to your preference.
Back-End Example
[1711049303].jpg)
Front-End Example
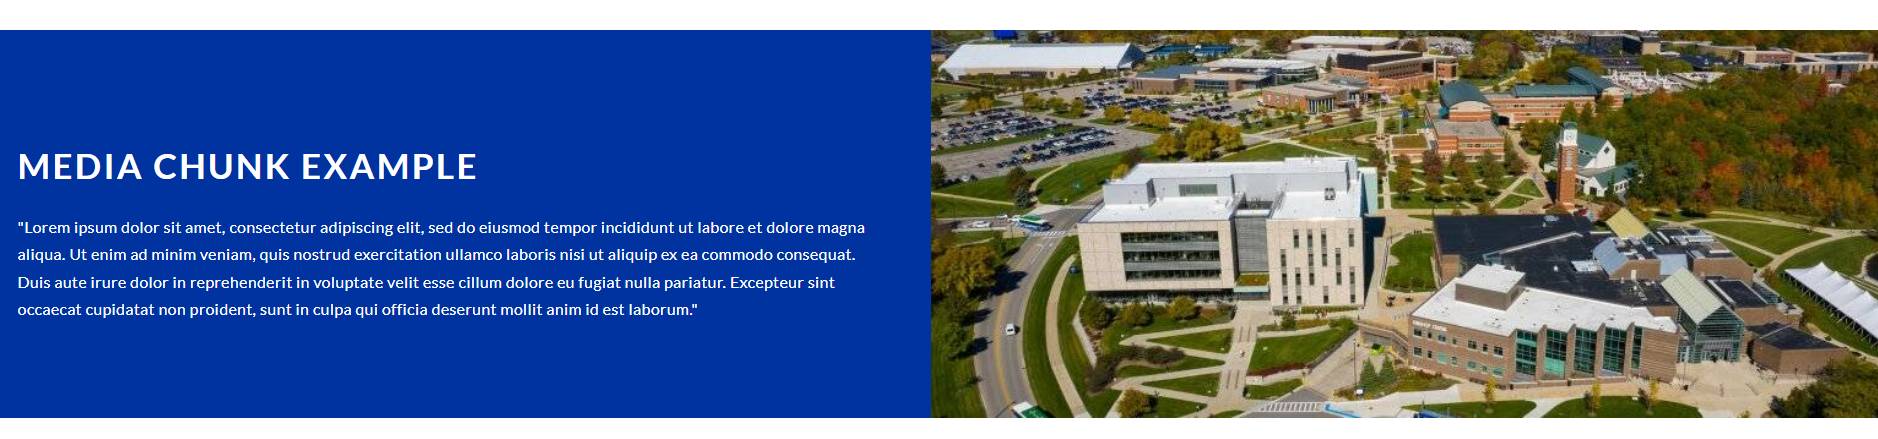
Media Chunk
What is it?
The media chunk allows an admin to display an image aligned with a paragraph of text in the same size dimensions.
When should I use it?
Use the media chunk to draw a user's eye to a specific section of a webpage using large visuals and formatted text.
How do I create one?
- Open up the content page you want to add a media chunk to.
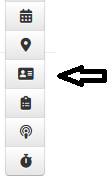
- Click on the "portrait with text" icon (see the image to the right).
- Drag the chunk to its desired location on the page, and resize if needed.
- Add a heading (optional) to the media chunk.
- Add text to the content box.
- Using the file manager, select the photo you want to feature.
- Add alternative text to the photo for accessibility purposes.
- Choose whether the photo will display on the left or the right.
- Choose your preferred background color for the chunk from the list of available colors.
- Add a section heading (optional) and choose the desired capitalization style for the section heading.
Back-End Example
[1711049303].jpg)
Front-End Example
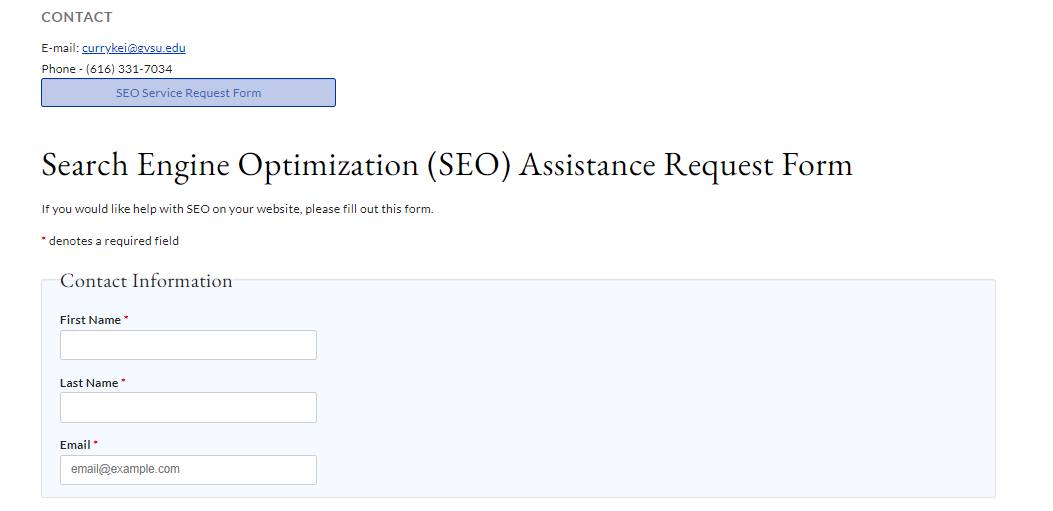
Form Builder Form
What is it?
A chunk that allows you to embed a form from your site's form builder. Learn more about how to create a form in our Form Builder Walkthrough.
When should I use it?
Use the form builder form chunk when you want to embed a form onto a different web page vs. sending user directly to the form itself.
How do I create one?
- Open up the content page you want to add a form builder form chunk to.
- Click on the "form" icon (see the image to the right).
- Drag the chunk to its desired location on the page, and resize if needed.
- Select the form from the list of forms in your form builder.
- Choose whether to display the form title or not.
Back-End Example
[1711049303].jpg)
Front-End Example
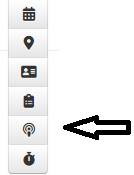
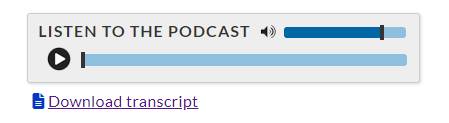
Podcast
What is it?
A podcast chunk allows you to easily put a podcast on your webpage, so people can listen to it without leaving your site.
When should I use it?
Use the podcast chunk when you want visitors to listen to a podcast without leaving your webpage.
How do I create one?
- Open up the content page you want to add a podcast chunk to.
- Click on the "audio" icon (see the image to the right).
- Drag the chunk to its desired location on the page, and resize if needed.
- Add a title (optional) to the chunk.
- Add the link (or upload) to the podcast you want to embed.
- Add the link (or upload) to the transcription of the podcast for accessibility.
Back-End Example
[1711049303].jpg)
Front-End Example
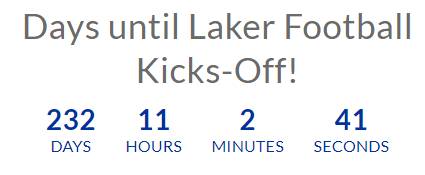
Countdown
What is it?
The countdown chunk lets you display a timer on your webpage, counting down to a specific date or event.
When should I use it?
Use the countdown chunk when you want to build anticipation with your audience and inform visitors about upcoming events.
How do I create one?
- Open up the content page you want to add a countdown chunk to.
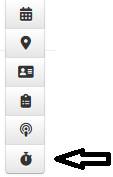
- Click on the "stopwatch" icon (see the image to the right).
- Drag the chunk to its desired location on the page, and resize if needed.
- Choose the date and/or time for the countdown end.
- Select the date you want the countdown to start.
- Choose the color of the countdown from the list of available colors.
- Add additional information to your countdown including a title, sub title, and content.
- Choose whether you want the countdown to stay visible on your page when it is over, or if you want it to be hidden.
Back-End Example
[1711049303].jpg)
Front-End Example