What is Emma?
Emma is the email marketing software that University Marketing selected for the creation and sending of email campaigns. It has a drag-and-drop interface similar to the CMS, manages subscriber lists, and provides reports measuring the effectiveness of a campaign. Two GVSU-branded email templates are available for university use and we can help with basic troubleshooting. Departments are responsible for content and recipient lists.
For brand consistency and maintenance reasons, we are unable to accommodate requests for custom templates.
Please note the following:
- Only one Emma sub-account will be created per department/office.
- Admin access is granted to individual GVSU network accounts only. Student employees must have a network account that begins with "s_" to use Emma. (These can be requested through IT.)
- Emma usage will be reviewed periodically and any sub-accounts without activity in the preceding 12+ months may be deleted.
Want access?
Please fill out the Emma account request form.
Logging in
Emma is accessed through Okta. Once your Emma permissions have been set, log in to https://my.gvsu.edu and click the Emma logo.
Still logging in with an Emma-specific password and emailed security codes? Contact Kelley ([email protected]) to have your access migrated.
To jump to a specific section, choose a topic:
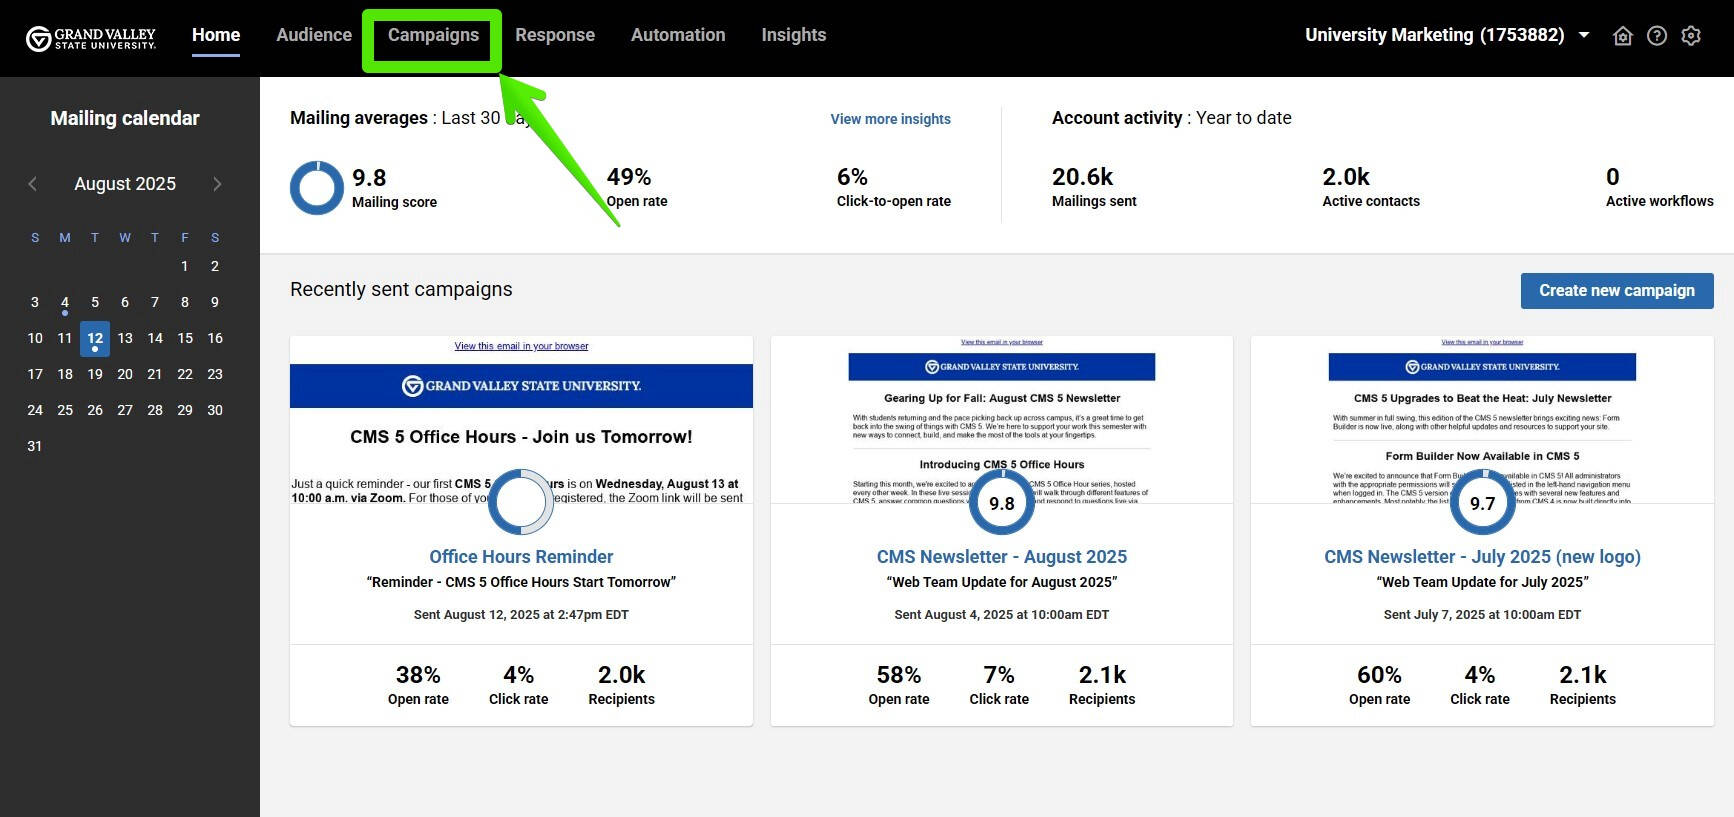
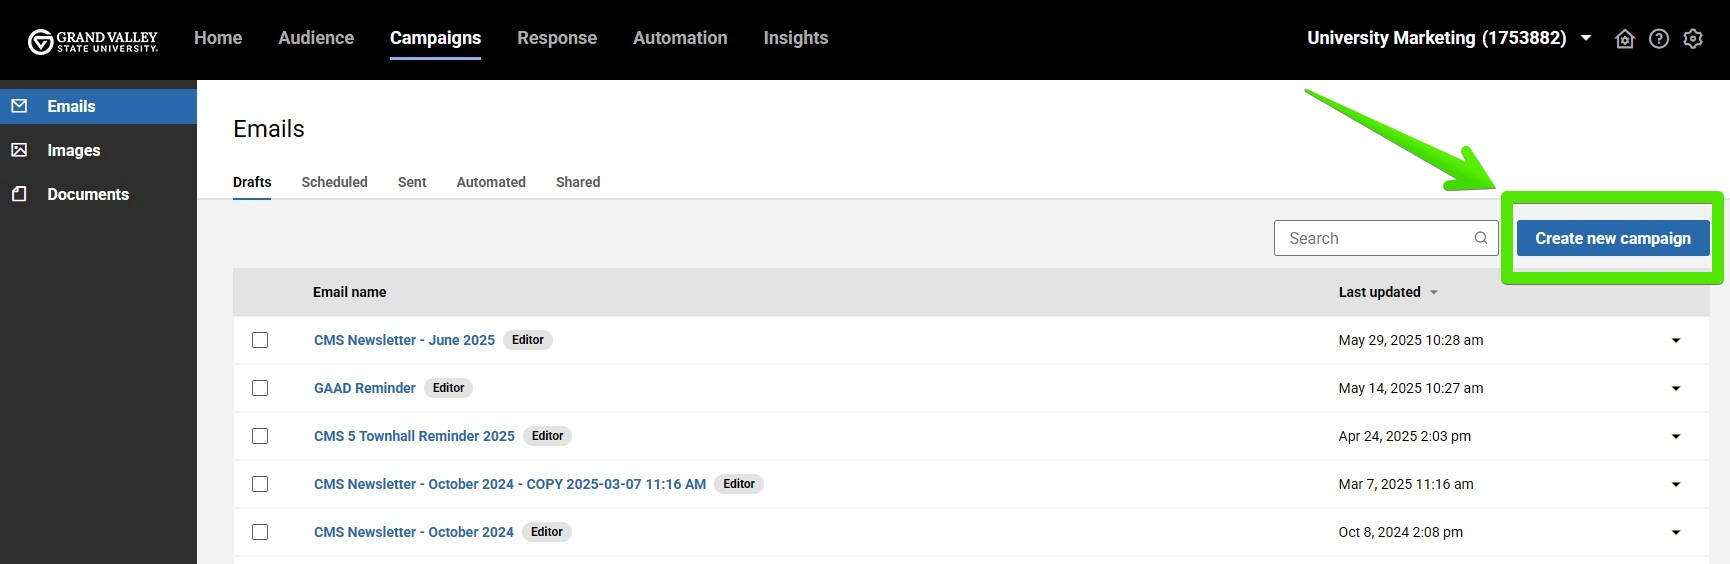
If your account is new, click the blue "Create new campaign" button in the center of the screen. Otherwise, to start a new email, the "Create new campaign" button will be on the right side of the screen. After clicking either button, you'll be prompted to name your email campaign.
To edit an existing email, simply click the email's name.
Adding and Editing Content
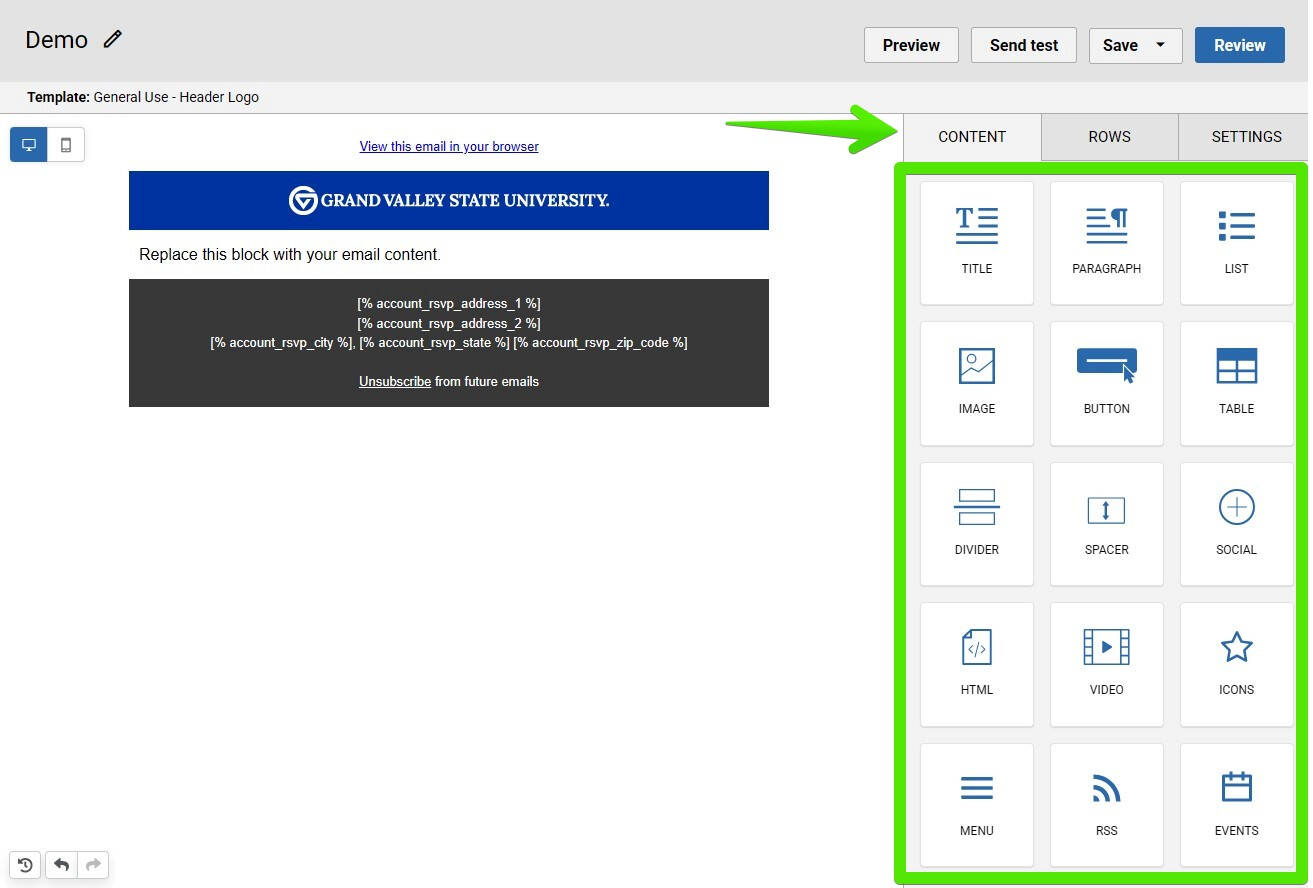
By default, a new email campaign will have a row containing one placeholder paragraph. There will also be a locked row with the GVSU single-line logo on a blue background, and a locked dark gray row with Emma tags to display your department/office address and an unsubscribe link. Emma will automatically replace these tags with your address when you send a test or send your finished email.
To add content: Click the CONTENT tab on the right panel, then drag a content block onto the email. A blue "Drag it here" bar will appear to help you position it.
Once it's in place, click the content block to edit it. This will bring up a properties panel on the right side of the screen.
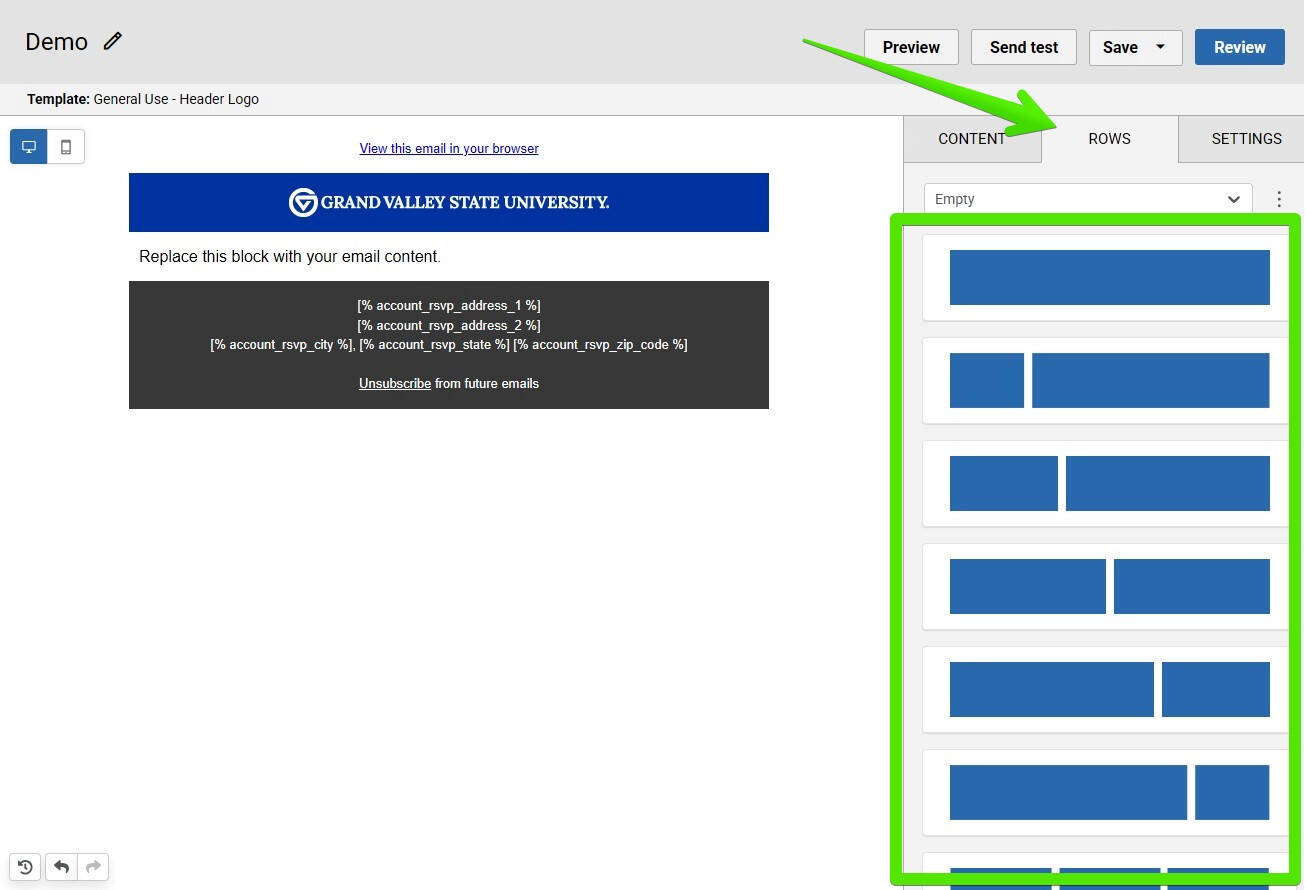
To add additional rows: Click the ROWS tab on the right side of the screen to see all the row options. Drag one onto the email, and a blue "Drag it here" bar will appear to help you position it. Once the new row is in place, click on the CONTENT tab to add content blocks.
Tip: You can stack multiple blocks in a single row. This can make it easier to set padding around sections or add a background color.
Adjusting rows and content items:
- To reposition something: Click and drag the 4-way arrow. For rows, this appears on the left side, and for content blocks, it's on the right.
- To duplicate something: Click the icon with two sheets of paper. For rows, this will be at the upper right corner of the row, and for content blocks, it's at the bottom right of the content.
- To delete something: Click the trash can icon. For rows, this will be at the upper right corner of the row, and for content blocks, it will appear to the bottom right of the content.
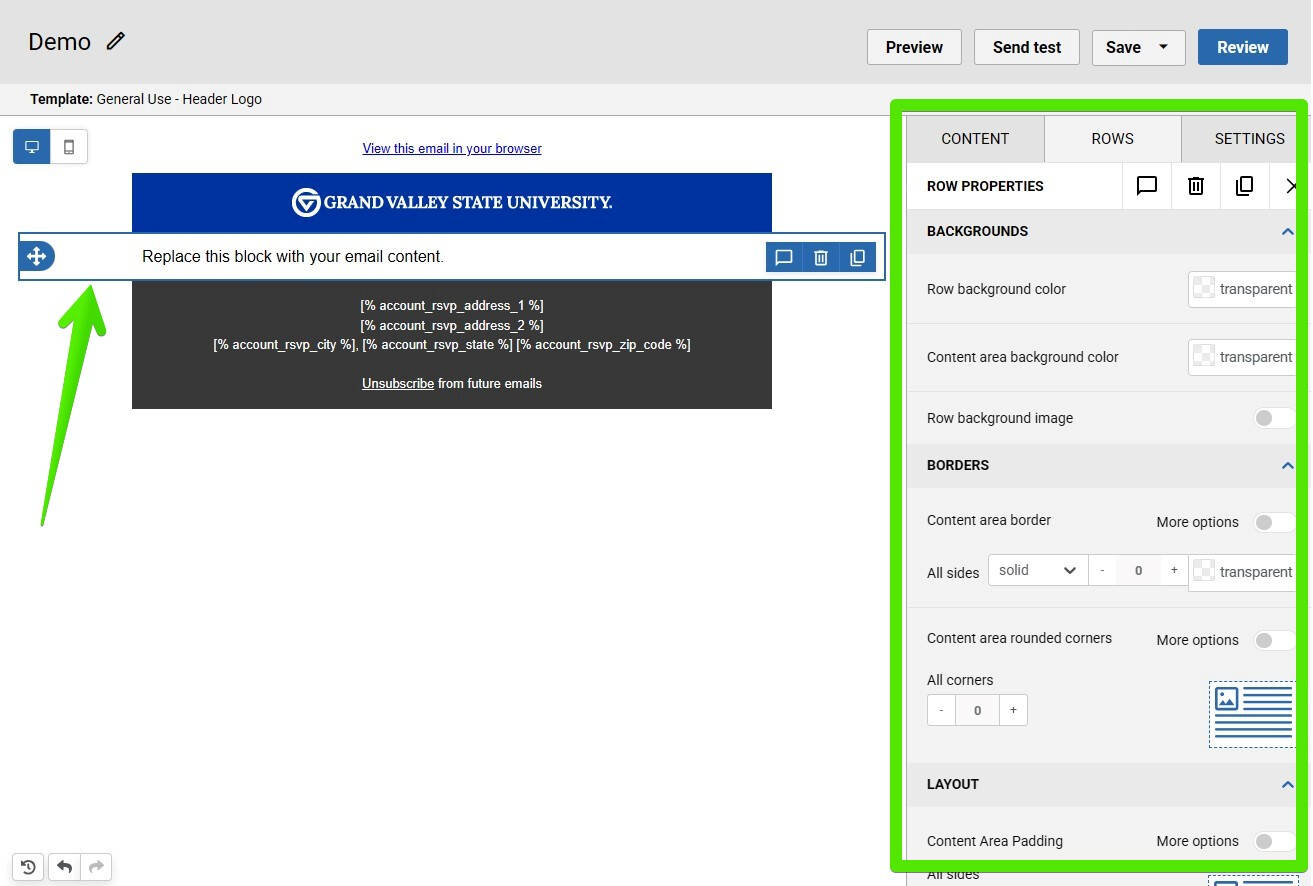
To select a row, click to the left or right side of the content block(s). The row will be outlined in blue and row properties will appear in the right panel.
(If you click a content block, the content properties will appear instead.)
GVSU header image options
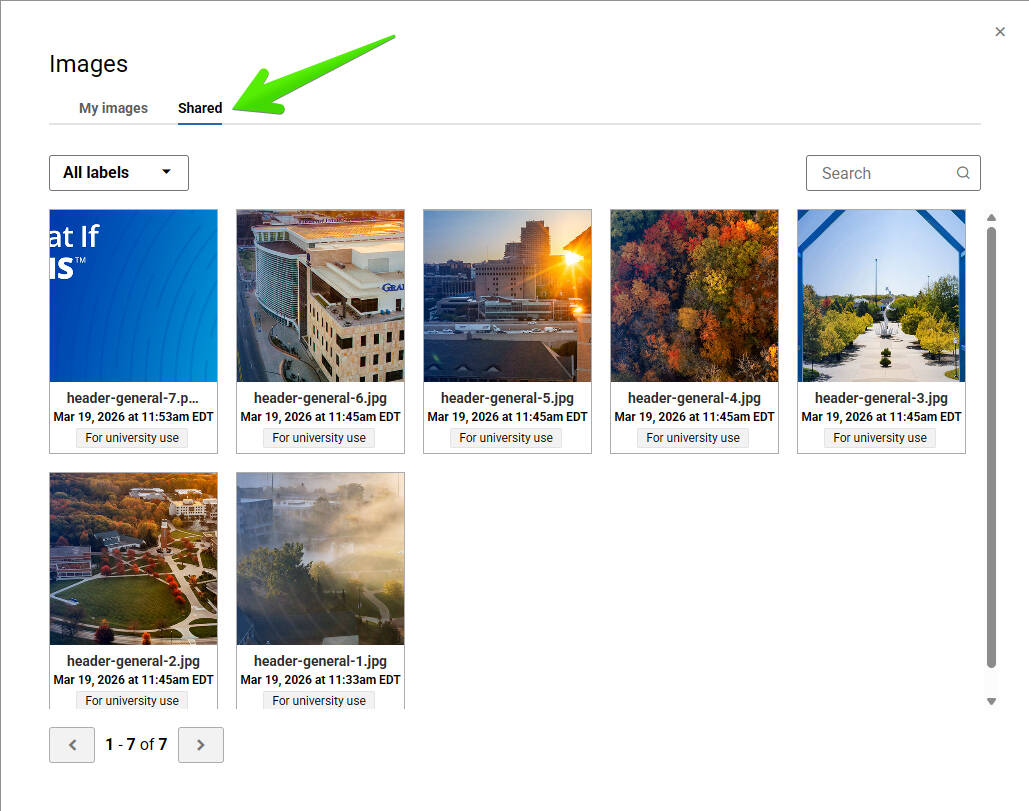
Add an image block, then click the "Browse" button. Next, click "Shared" at the top of the window. Click any of the image thumbnails to add it to your email.
(Want to try another one? Click the blue "Change image" button on the right panel to bring up the image browser again. Then, go back to the "Shared" tab and pick another image.)
Undo:
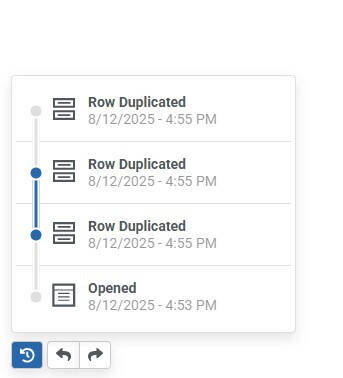
There are three icons in the lower left corner of the screen.
The left icon (clock hands with a counterclockwise arrow) shows all edits made during your work session. To jump to any previous point, click that entry on the list.
To step through previous edits in your work session, use the left or right arrows.
A few tips:
- The Paragraph block is used for text with the same font size, font face, color, etc. Use separate Paragraph blocks if you need different font sizes, alignment, etc.
- Click the "More options" slider in the Padding section to specify separate values for top, right, bottom, and left sides.
- The hex code for GVSU Blue is #0032A0.
- When placing a Grand Valley logo in emails with a white background, use the blue version of the logo. This ensures proper background contrast in both light and dark viewing modes.
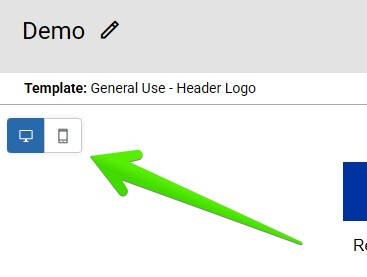
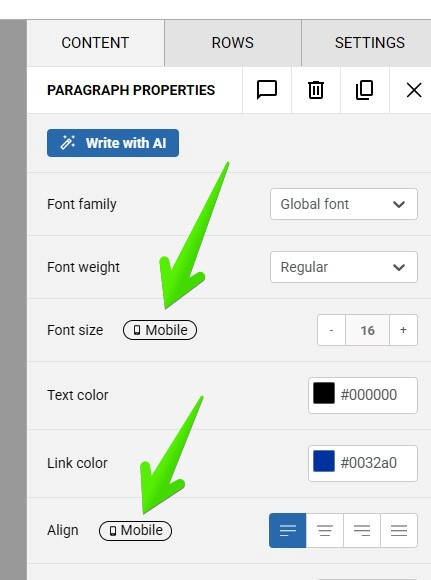
Select any of your content blocks and you'll probably notice at least one "mobile" indicator in the right column's settings. If you make any changes to that section, "mobile" will turn blue. This means adjustments have been made (padding, alignment, etc.) that affect mobile view only.
To go back to desktop view, click the computer monitor icon in the upper left corner. The "mobile" indicator(s) in the right column will disappear, and any edits made will affect desktop view again.
Duplicating an Email
Once an email has been built, you may want to make a copy of it for future use.
Before Sending:
From the "Emails" (drafts) screen, click the down arrow to the right of the email's name. Click "Duplicate".
After Sending:
Click the "Sent" tab under the "Emails" page title. You'll see a list of all the emails you've sent. Click the down arrow to the right of the email, then click "Duplicate".
Recipients
Contact lists are typically added by uploading an Excel or .csv file.
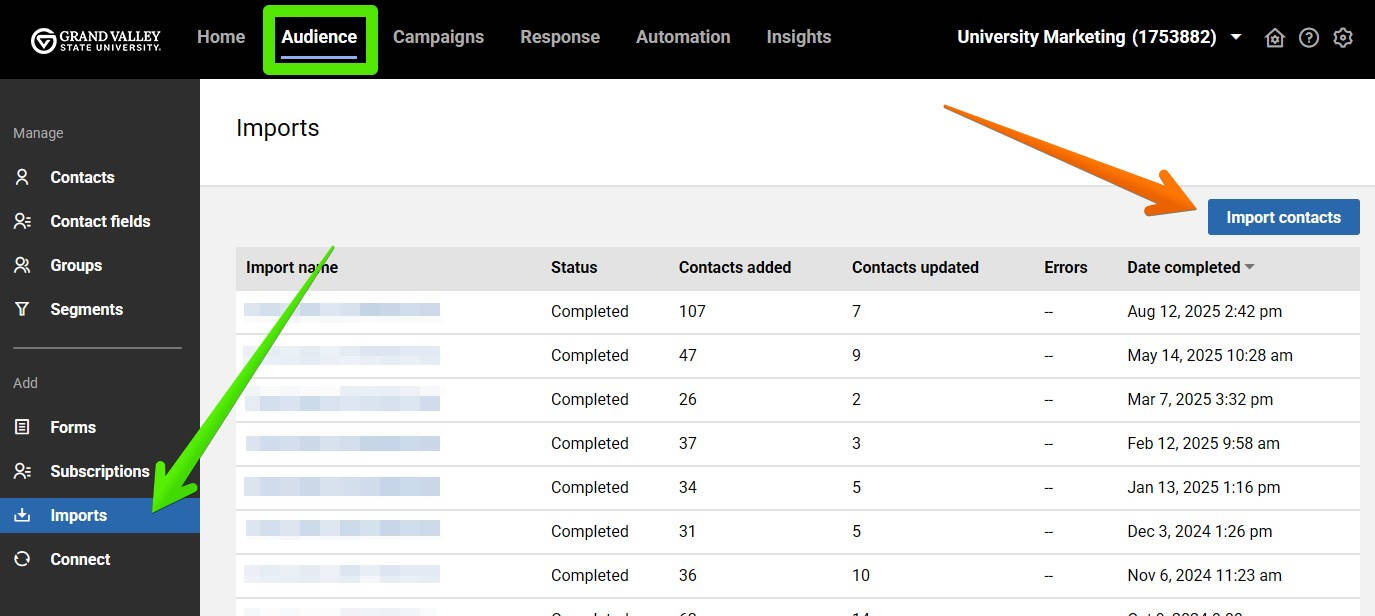
To add recipients, click the "Audience" button in the top toolbar, then click "Imports" (in the Add section). Finally, click the "Import contacts" button on the right side of the screen.
- First, upload the file from your computer, then click "Continue" in the bottom right of the screen.
- Now you'll be prompted to map your fields, then click "Continue".
- If your file has a header row, check the "Skip" box next to the Row 1 heading.
- If there are any fields you do not need to import, choose "Ignore" in the Contact fields column.
- Next, choose what group the contacts should be added to, and click "Continue".
- If the Group already exists, put a checkmark next to it to select it.
- Otherwise, enter a name for your group and click "Add" to create it.
- Finally, you'll see a summary screen. If everything looks correct, click "Import".
Only need to add a few recipients to a group and don't have an Excel file? No problem!
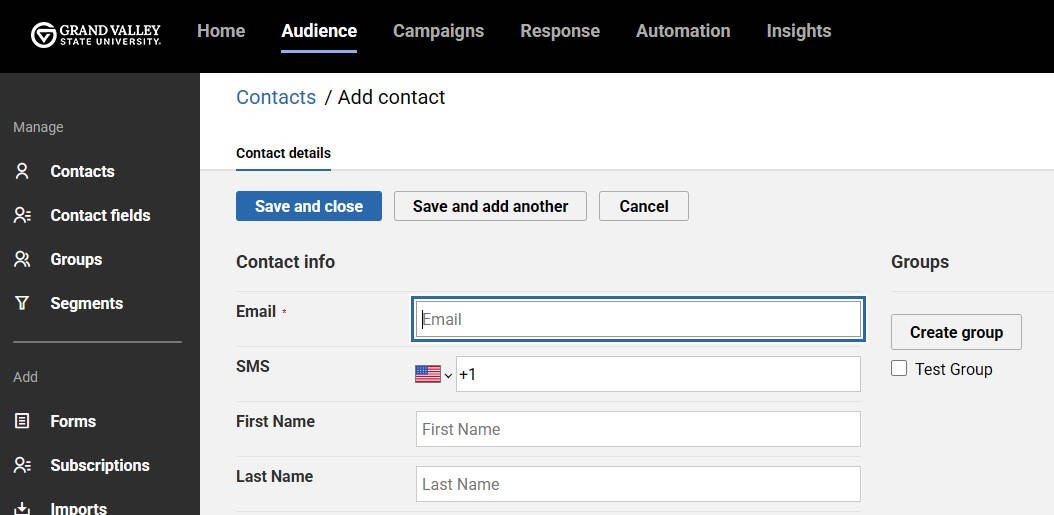
From the Contacts screen, click the blue "Add contact" button on the right side of the screen.
In the email field, enter one email address. Before clicking the relevant save option ("Save and close", "Save and add another"), you may want to select what group(s) the email address should be included in; those can be found on the right side of the screen.
Sending
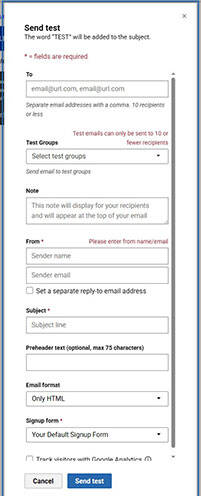
Emma allows you to send a test email to as many as 10 addresses at once. Click the "Send test" in the top toolbar. A window will pop up where you can specify your recipient addresses, an optional note for your recipients, sender info, a subject and optional pre-header lines.
Tip: Send all test emails directly from Emma! Forwarding an email can negatively affect how the email looks to the recipient.
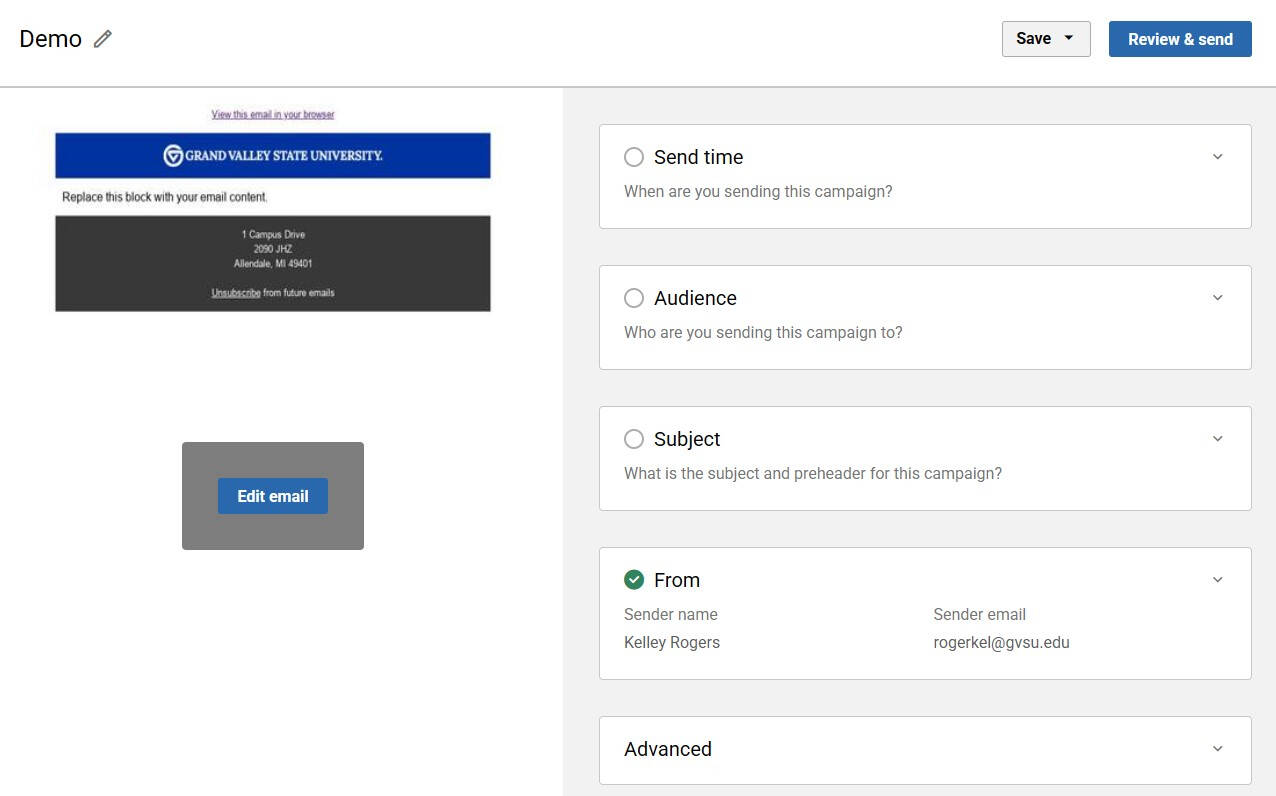
Once you're ready to send the email, click "Review" in the upper right corner. From there, specify your:
- Send time: Immediately, or a date/time in the future
- Audience: Pick your group(s) or segment(s) from the dropdown
- Subject: Give your email a subject line (and pre-header if you'd like)
- From: The name and email address that your email will be sent "from"
Then, click "Review and Send" in the upper right corner. A window will appear to confirm your selections, and once everything looks correct, click "Send campaign".
Campaign Results
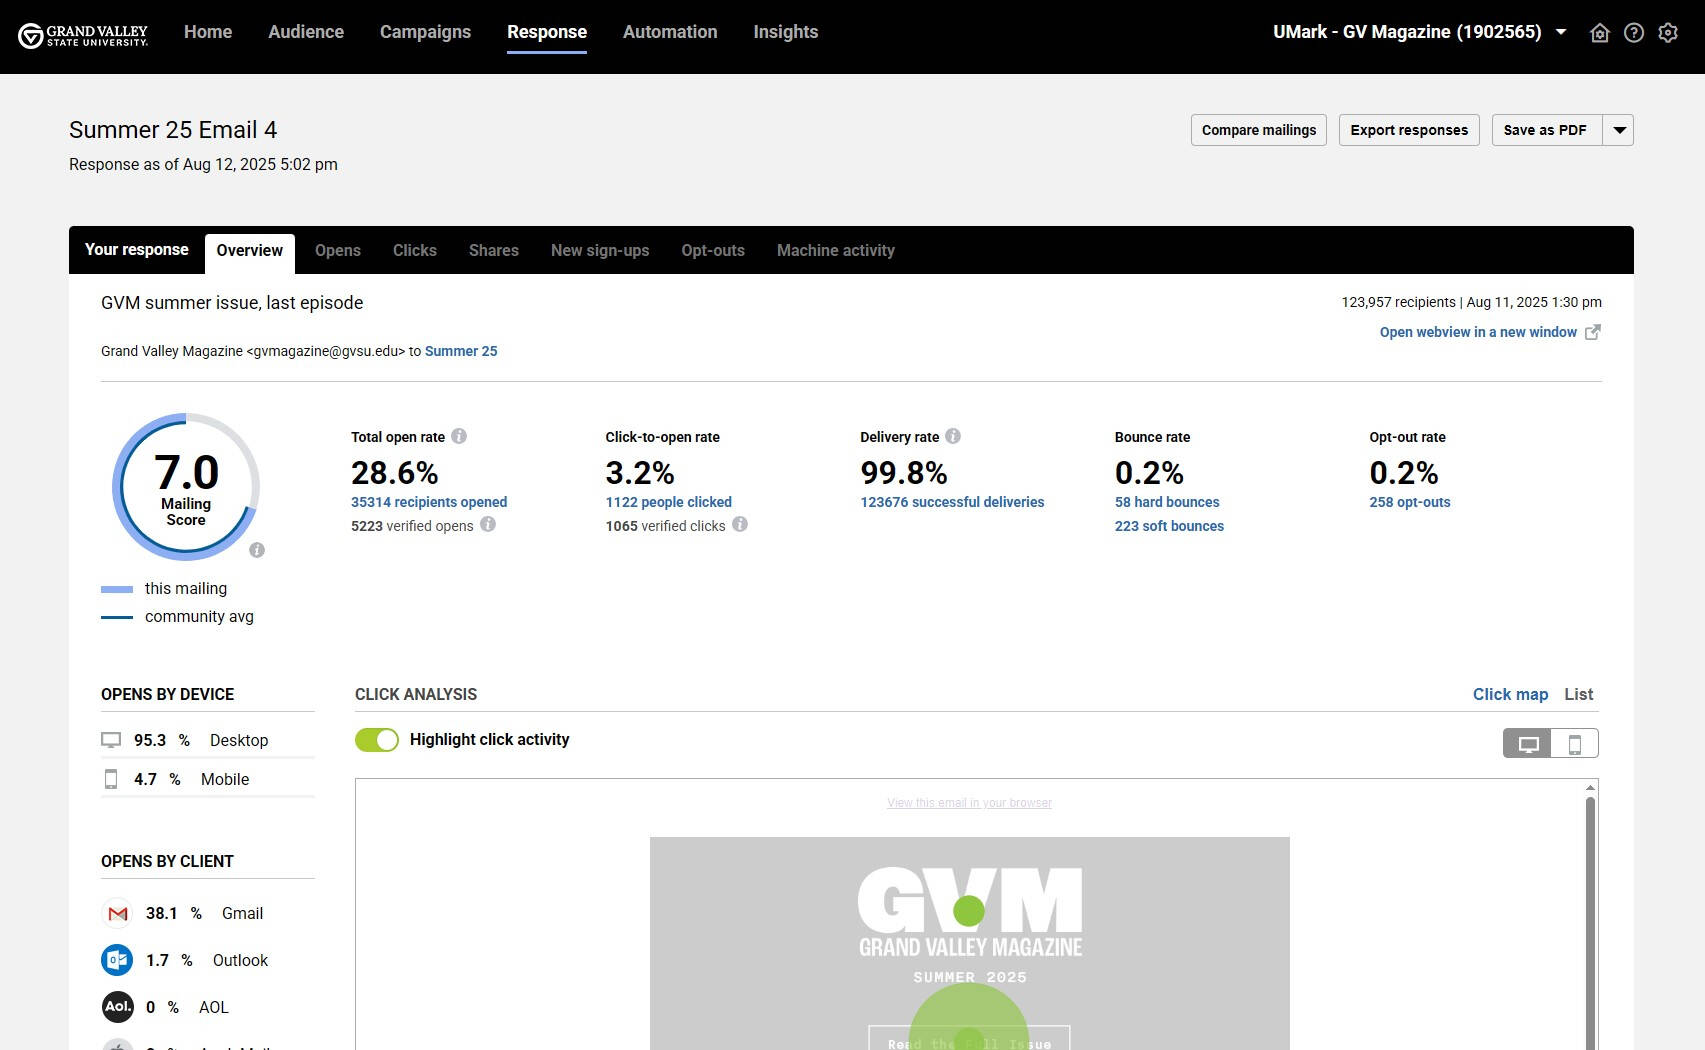
After the email is sent, you'll begin to see reports on the Response section of your account. Click the name of the campaign to view its reports.
Basic statistics are shown on the first screen: open rate, click-to-open rate (how many links were clicked by those who opened your email), etc.
To see more detailed response reports, click one of the tabs near the top of the screen.
Advanced Tip: Background Color
Setting a background color behind a full row
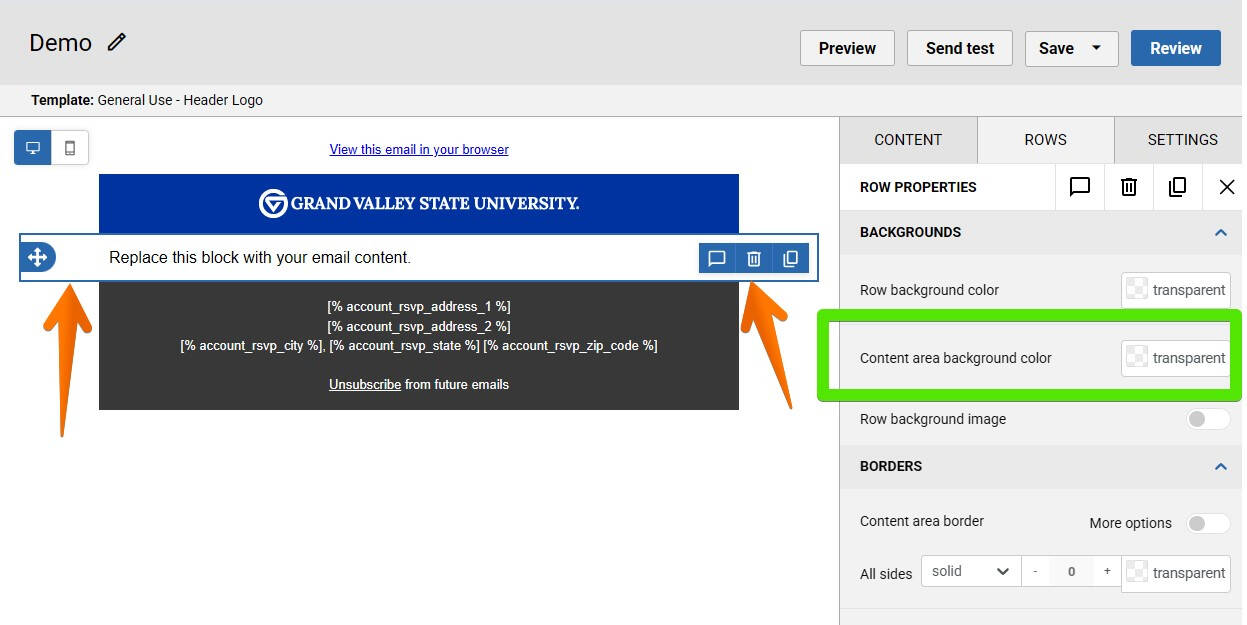
Click somewhere in the white space to the left or right of the row you’re working on. It’ll be outlined by a thin blue line.
Click the transparent swatch next to “Content area background color” in the right panel. Select your background color with the picker that appears.
Hint: Click the square itself, not the word "transparent". The cursor will turn into a hand if you're in the right spot.
Setting a background color behind one content block
Click somewhere in the white space to the left or right of the row you’re working on. Again, the row will be outlined by a thin blue line.
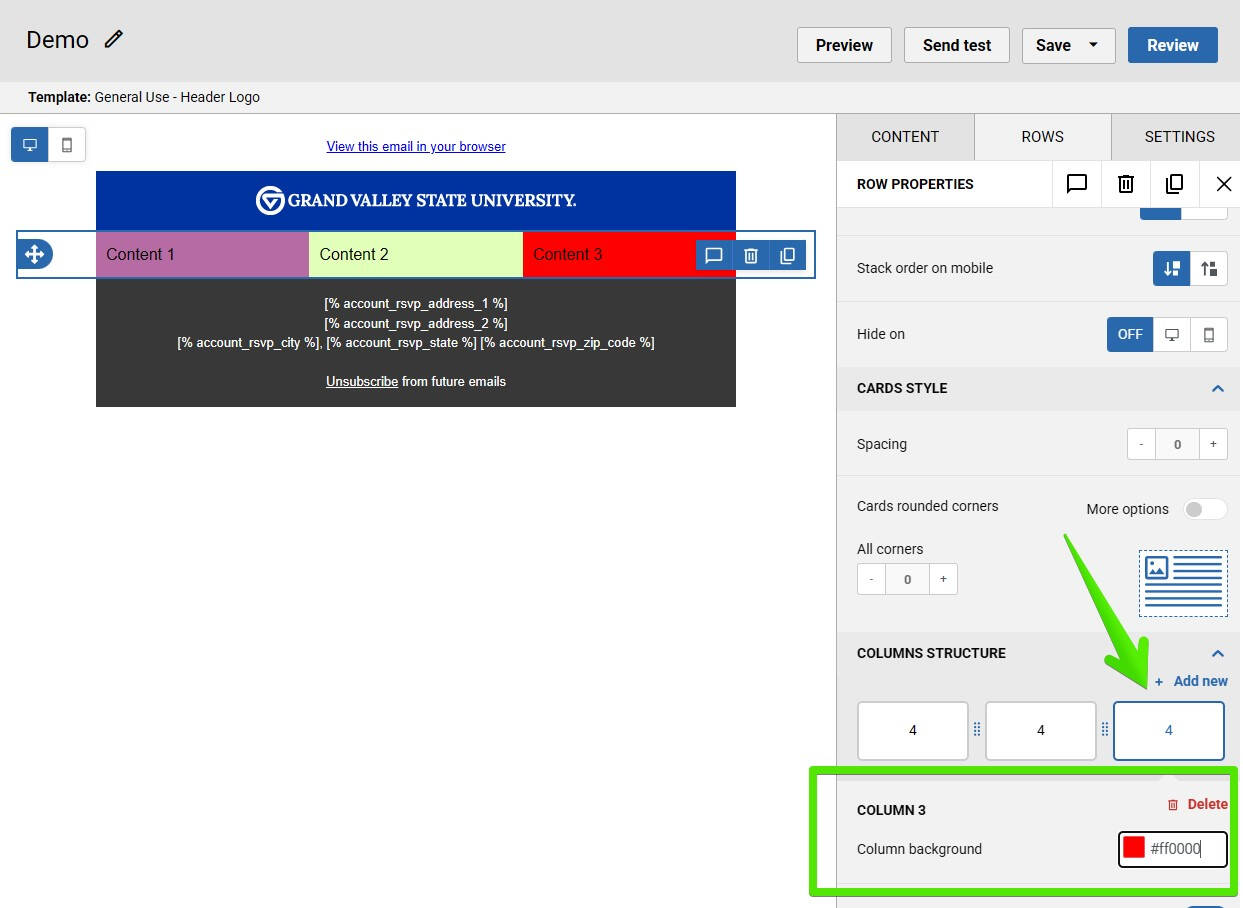
In the right panel, scroll down to “COLUMNS STRUCTURE”.
In COLUMNS STRUCTURE, click the cell you want to set a background color on. (In the screenshot, the right one is selected; it's outlined by a thin blue line.) Below that you’ll see a “Column background”. Click the color swatch square to open the color picker.
To add colors to the other cells as well, click another cell under “COLUMNS STRUCTURE” to select it, then set its “Column background”. Repeat as necessary!
Advanced Tip: Recipient List Cleanup
The easiest way to clear out recipients you no longer contact is through a segment. This allows you to keep necessary audience groups intact and remove everyone else.
First, clean up your groups:
- From the "Audience" section in the top navigation, click "Groups" in the left column.
- Put a checkmark in front of the groups you no longer need, then click the "Archive" button that appears above the column.
- In the confirmation window, click "Archive".
Next, set up the segment:
- Click "Segments" in the left column.
- Click the "Create a segment" button on the right side of the screen.
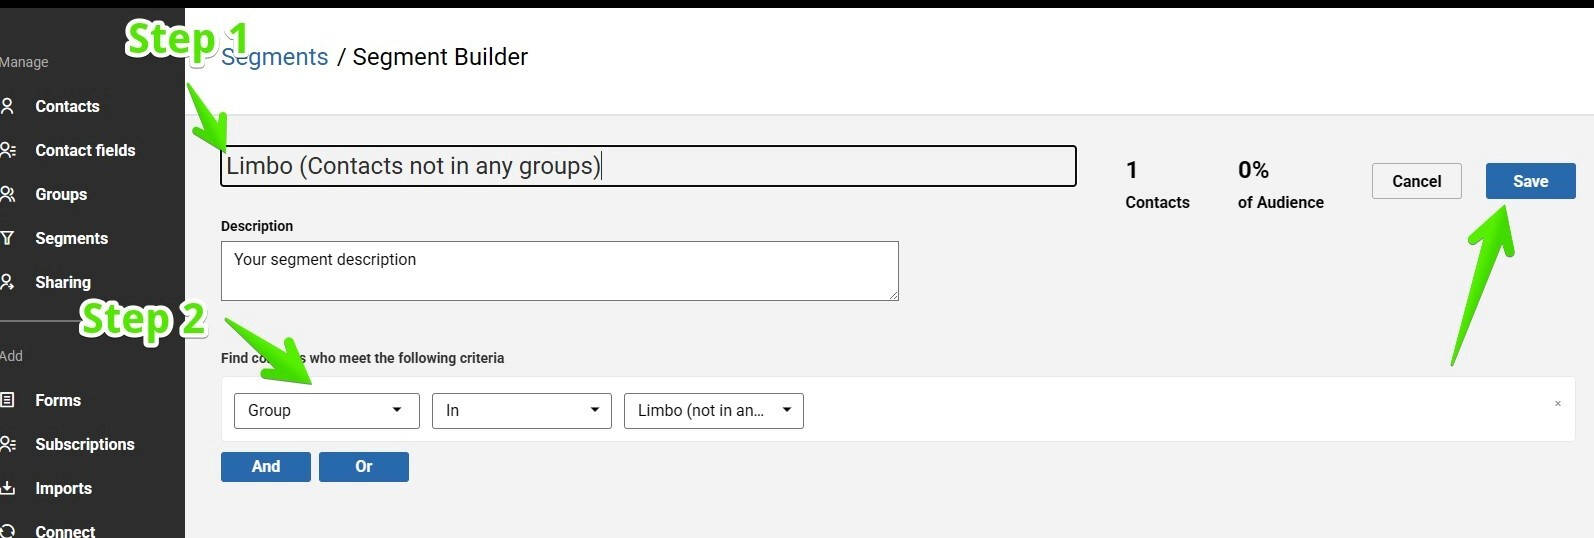
- First, name your segment.
- Then, choose these options:
- Segment type: "Group" under the "Audience" category.
- Keep the second dropdown on "In".
- Select a group: "Limbo (not in any group)"
- Click the "Save" button on the right.
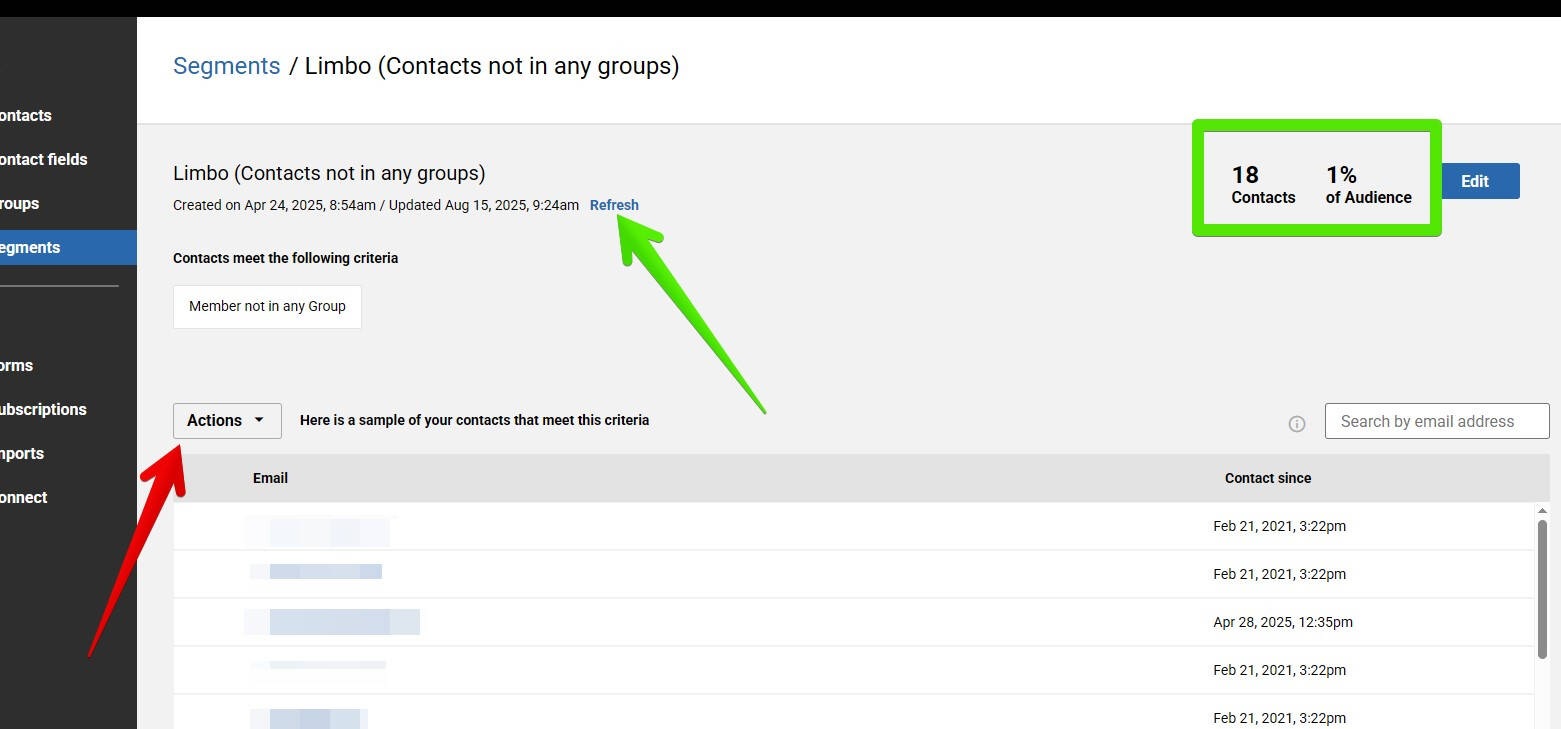
To run your segment, click the "Refresh" link. It may take a minute or two for Emma to scan your contacts, then the "Contacts" and "% of Audience" numbers will update.
Click the "Actions" dropdown and choose "Archive All". On the confirmation window that appears, click the "Archive" button.