Changing Permissions or Stopping Sharing in Outlook 2010 for Windows
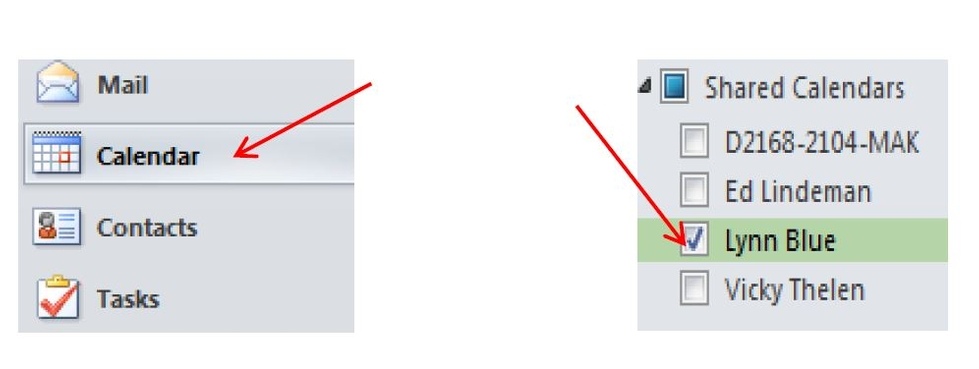
- Click on Calendar View or the specific Shared Calendar in the Navigation Pane.
2. Select the Share Calendar button in the Ribbon.

3. Change permissions, as desired. There are two options:
- To make a change that affects everyone: Select Default from the Name list (the name will highlight blue and display the current permissions granted). Then, make a selection from the Permissions Level drop-down list or to completely revoke all access, select None.
- To make a change to a particular user’s permissions: Select the user’s name from the Name list (the name will highlight blue and display the current permissions granted). Then, from the Permission Level drop down list, select the level of access that you want to grant this user.
Note: A detail description of permission options are defined on the training guide Sharing a Calendar with Everyone
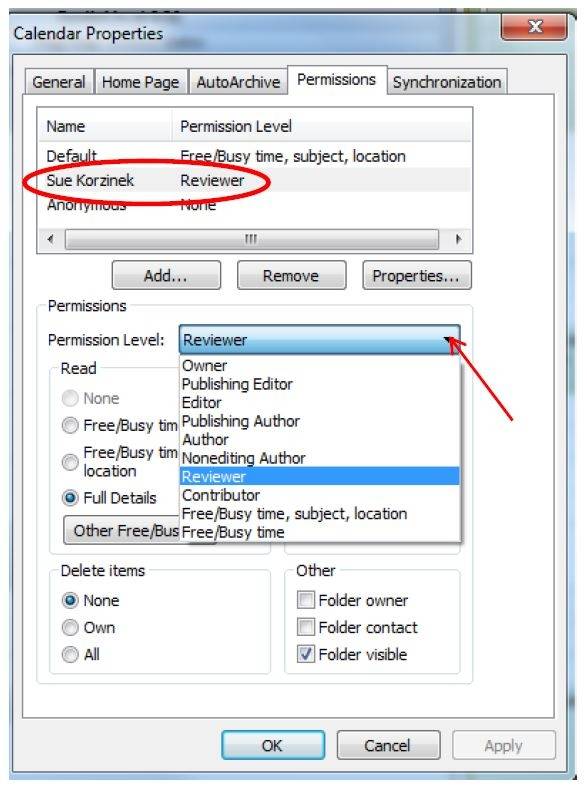
4. Click OK. The permissions are changed right away.
Note: If someone is viewing your calendar at the moment that you change his or her level of access, the change takes place immediately – or, at least, as soon as the network traffic allows.