Advanced Emma Tips: How Do I...?
Clear Unused Recipients
The easiest way to clear out recipients you no longer contact is by setting up a segment. This allows you to keep necessary groups intact and remove everyone outside those groups.
First, you'll want to clean up your groups:
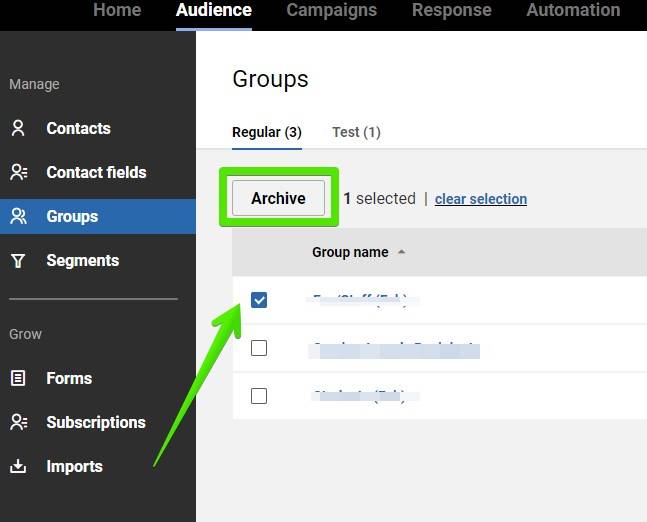
- From the "Audience" section in the top navigation, click "Groups" in the left column.
- Put a checkmark in front of the groups you no longer need, then click the "Archive" button above the column. In the confirmation window that appears, click "Archive".
Next you'll set up the segment:
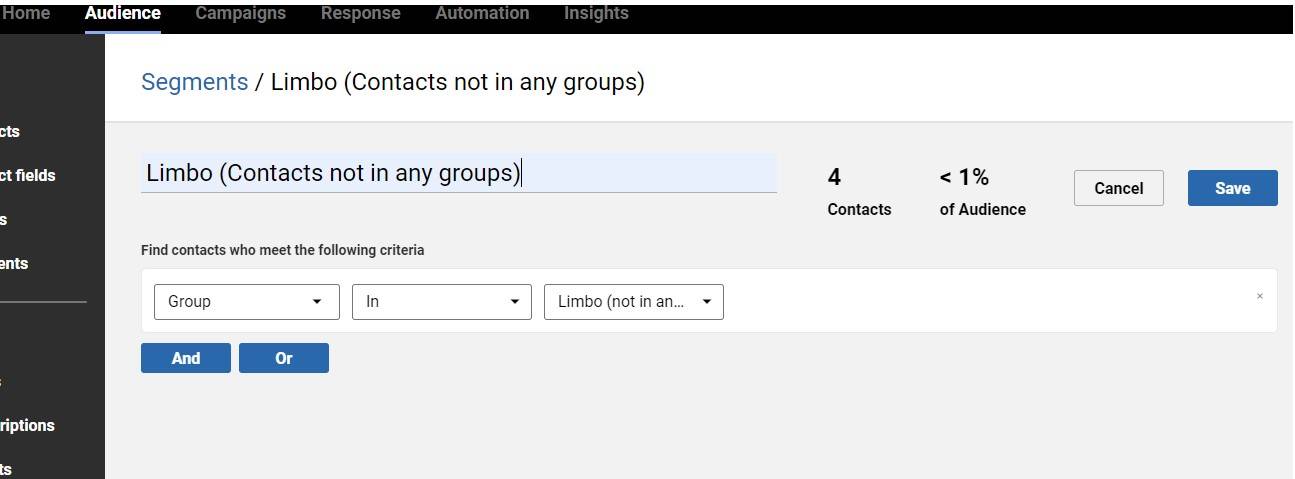
- Click "Segments" in the left column.
- Click the "Create a segment" button on the right side of the screen.
- Name your segment.
- Under "Find contacts who meet the following criteria", choose these options:
- Segment type: "Group" under the "Audience" category.
- Keep the second dropdown on "In".
- Select a group: "Limbo (not in any group)"
- Click the "Save" button on the right to save your new segment.
To run your segment, click the "Refresh" link. It may take a minute or two for Emma to crawl your contacts list, then the "Contacts" and "% of Audience" numbers will update.
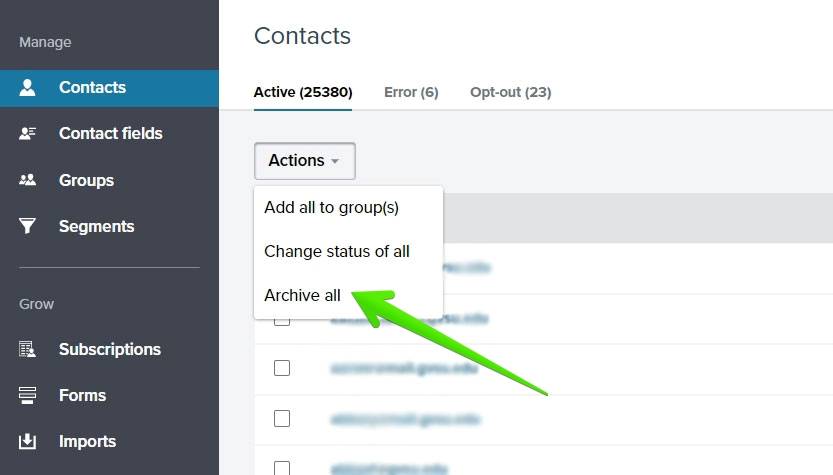
Click the "Actions" dropdown and choose "Archive All". On the confirmation window that appears, click the "Archive" button.

Remove All Recipients
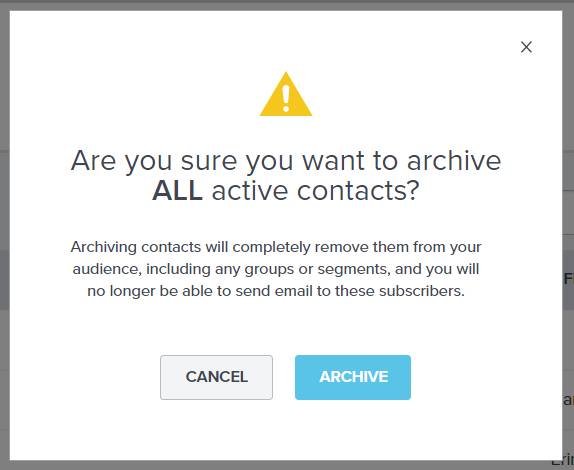
From the Audience section, click "Contacts" on the left. In the "Actions" drop down, select "Archive all".
An alert window will appear, confirming that all active contacts will be removed. Click the "ARCHIVE" button.
Don't worry! "You will no longer be able to send email to these subscribers" just means that until you upload a new list, you will not be able to contact your recipients. Archiving contacts does not permanently unsubscribe them from your emails, and archived contacts can be included in groups in the future.
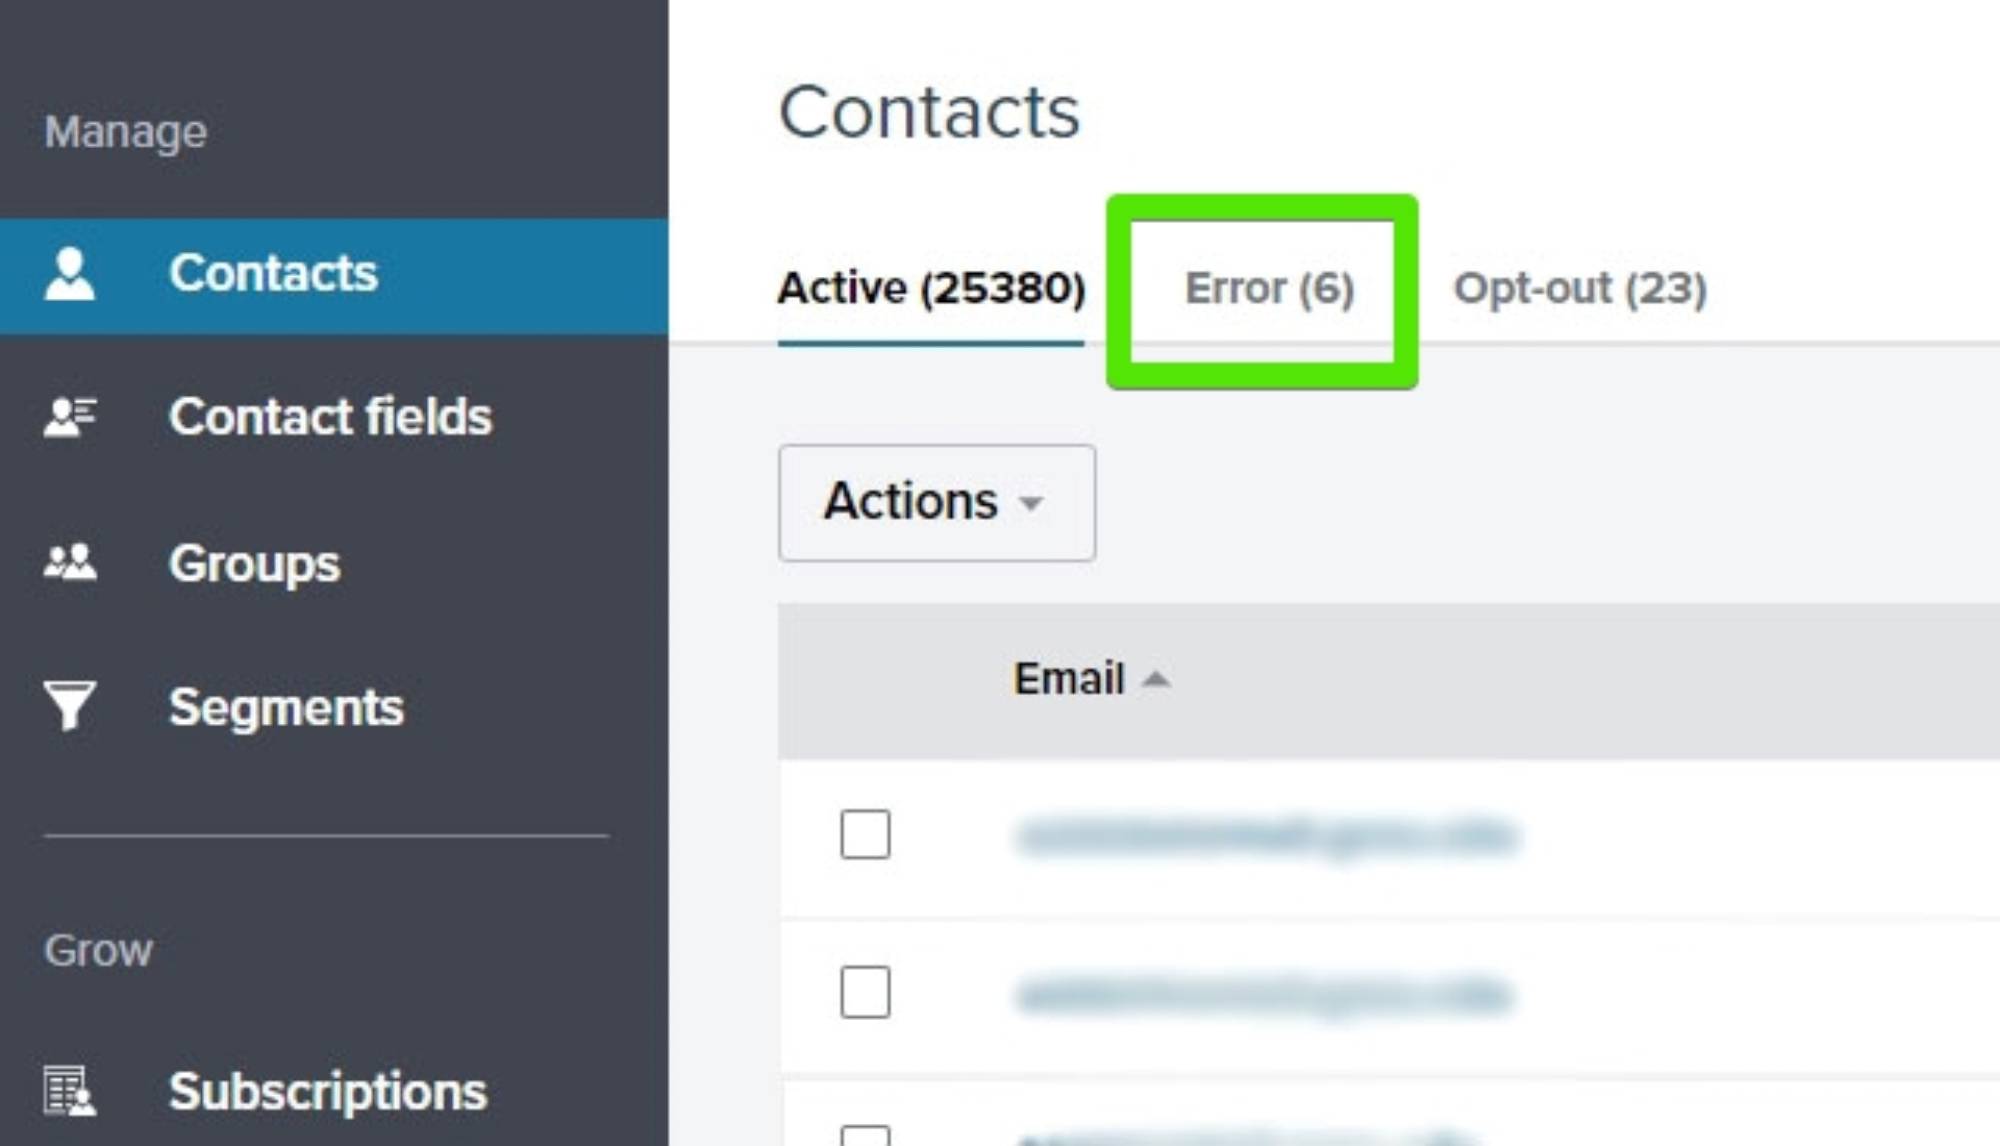
After cleaning up your active contacts list, you'll probably want to follow the same steps for your Error contacts.
According to Emma, contacts with a status of Error or Opt-Out do not count toward your audience total for billing purposes. However, email addresses are typically in this category because they have incorrect formatting (missing the @, have a misspelling, etc.) or they "hard bounced". (A hard bounce indicates a permanent reason an email cannot be delivered — the email address or domain no longer exists, the mail server has blocked delivery, etc.)
You can find this list under the "Error" sub-navigation tab.
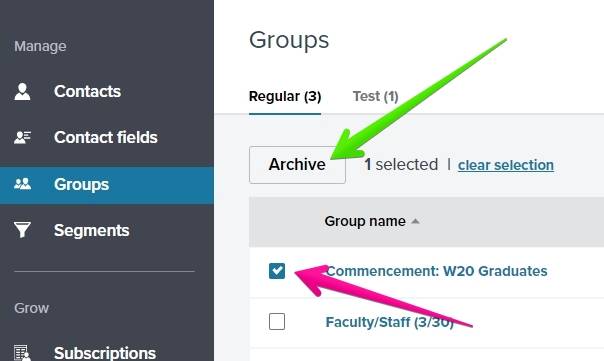
Now that you've archived your contacts, you probably have at least one group that can be removed.
To remove the empty group:
Click "Groups" in the left column. Put a check in the box that appears to the left of the group's name, and click the "Archive" button that appears above the column.
Export Recipient Lists
Note: This permission has to be granted individually. If you don't see the export button on a group page, contact Kelley Rogers ([email protected]) for access to it.
From the Groups page, click the name of the group you'd like to export.
You'll be taken to a screen that shows all of the contacts in the group you selected. Click the "Export" button on the right side of the screen.
A window will appear with four options:
- All contacts
- Active contacts
- Error contacts
- Opt-out contacts
You can choose "All contacts" if you wish, but the only list you probably need to export is the "Active contacts" list. (Emma maintains records about who opted-out, and error contacts are typically invalid email addresses.) Click the "Export" button. A second window will appear, confirming that your export is running.
To download the file, click the "View the exports page" link.

The Exports page will show a list of everything you've exported recently. To download a file, click the down arrow on the right side of the screen, then click "Download this export". (Files are available to download for 7 days; if it's been longer, follow the steps again to generate a new file.) The file will be saved to your computer.

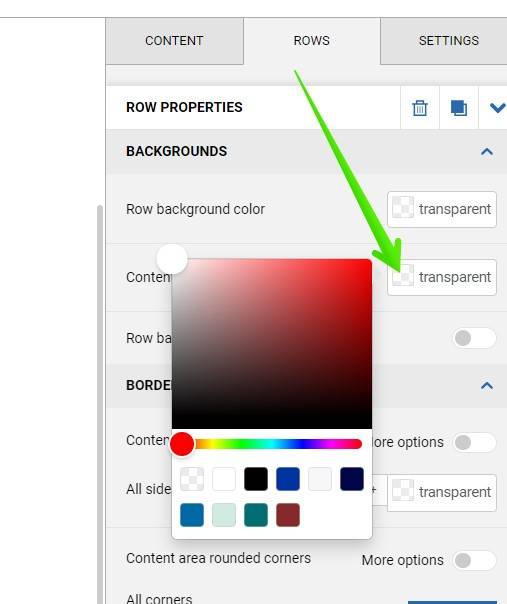
Change the background color behind part of an email
- From the "ROWS" tab on the right side of the screen, pick a row layout and drag it onto the email. Click the new row to select it.
OR - Click to the left or right side of your content to select an existing row.
The "ROWS" tab on the right now shows properties for the row.
Click the checkered swatch for the "Content area background color" to select it, and pick a new color. (Note: keep the "row background color" as-is!)