Blackboard: Blogs
A blog is a personal online Blog that is frequently updated and intended to share with others. Most blogs also have a commenting feature, so that people can respond to one another's thoughts. Each Blog entry can include any combination of text, images, links, mashups, and attachments. Instructors create and manage blogs, and only enrolled users can view and create entries and comments in them. Blogs can be used for a graded assignment or to gather opinions and information without assigning a grade.
An instructor can choose to allow students to participate in Blogs in three ways:
- Course Blogs: All course members can add blog entries and add comments.
- Individual Blogs: only individual course members are able to add blog entries. All other course members can view and add documents.
- Group Blogs: If the blogs tool for groups is enabled, all group members can add blog entries and make comments on blog entries. Any course member can view group blogs, but can only add comments.
How to Create a Blog
- Access the course and ensure Edit Mode is ON
- In the Control Panel, expand the Course Tools tab and select Blogs
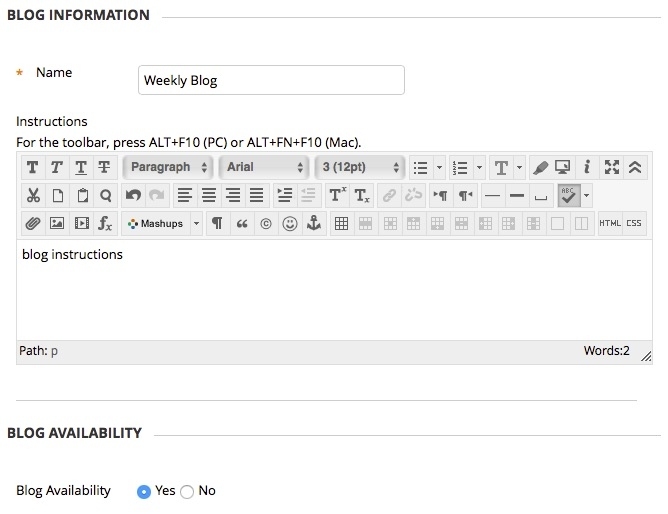
- On the Blogs page, click Create Blog
- Type a name and optional instructions. Make the Blog available to students.
- Select Blog Date and Time Restrictions if needed
- Select Blog Type
- In the Blog Settings section, select Monthly or Weekly Index Entries.
- Optionally, select the check boxes to allow users to edit and delete entries, or delete comments.
- In the Grade Settings sections, select no grading or the grade option and type the number of points possible. Points possible will apply to one or more entries made by the user to the Blog topic. After you enable grading, a column is created automatically in the Grade Center. After checking the grade option, the Blog is permanently gradable, and you can’t change the setting to No Grading
- If you choose to grade the Blog topic, select the check box for Show Participants in needs grading status and select the number of entries required. If you apply this setting, the Needs Grading icon will show in the Grade Center. The entries will appear in the queue on the Needs Grading page after student activity meets this threshold.
- Add a due date and rubric if wanted
- Select Submit
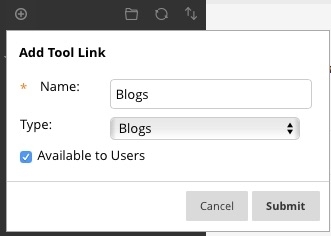
Add a Course Menu Link for a Blog
To make the Blogs you have created easily accessible to your students you can add a tool link to your course menu for the Blog.
- Select the plus sign at the top of your course menu and select Tool Link
- Name the link
- Under Type, select Blogs
- Select Available to Users and click Submit