Blackboard Collaborate: Audio and Video
Prior to participating in a Collaborate session, you should ensure that your audio and video are configured correctly.
When a user launches a session for the first time, they will be prompted to complete an Audio/Video setup. This allows users to setup their browsers with permission to use audio and video. Once permissions are set, the test allows users to see if their mic and video are working. Users must complete this check at least once. After that, they will not be prompted again unless they clear cookies and cache in the browser. As an exception though, in Chrome if the user is incognito, the setup prompt will run every time.
In browsers using WebRTC, the audio/video settings are controlled by browser and are therefore allowed directly through the browser.
Audio and Video Tests
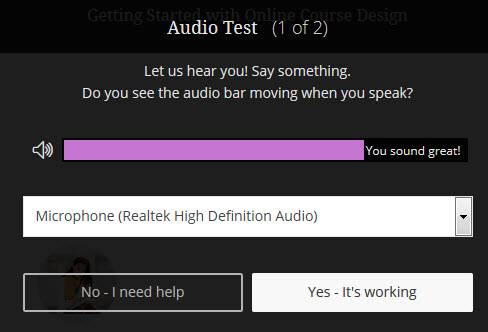
Collaborate will first test your audio connection.
- Select the desired input device from the drop-down menu.
- Say something in to the microphone you’ve selected.
Note: If you see the audio bar moving when you speak, select Yes-It’s working to continue your progress through the Tech Check. Selecting No-I need help will take you to Blackboard Help for more information.
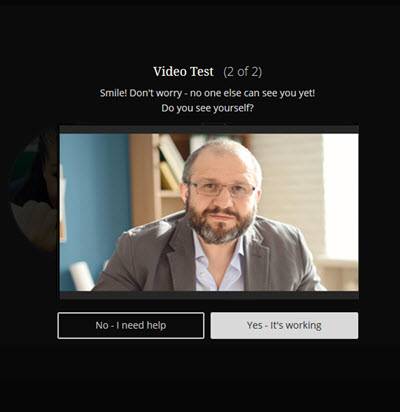
Likewise, for the video test:
- Select the desired input device from the drop-down list. Don’t worry; no one can see you.
Note: If you see yourself selecting Yes-it’s working will complete the tech check process. Clicking No-I need help will automatically redirect you to Blackboard Help for more assistance.
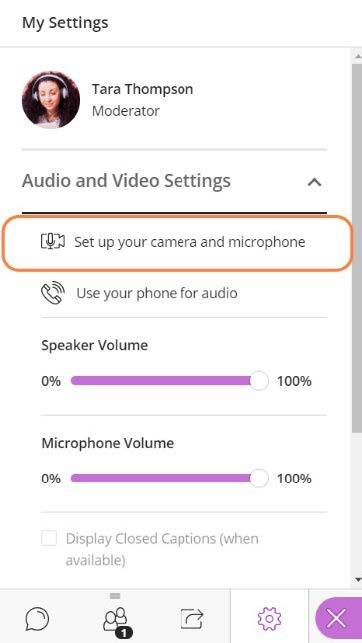
Users that have already completed the initial permissions check can access the audio and video check again from the Collaborate Panel > My Settings > Audio and Video Settings> Set up your Camera and Microphone. The interface of this panel is same in both Flash and WebRTC browsers.
Users receive guidance prompts on Interaction Bar icons letting them know when they have everything set up right and are ready to start speaking. User must click out of the prompts in order to close the dialogue box.
Audio and Video Indicators
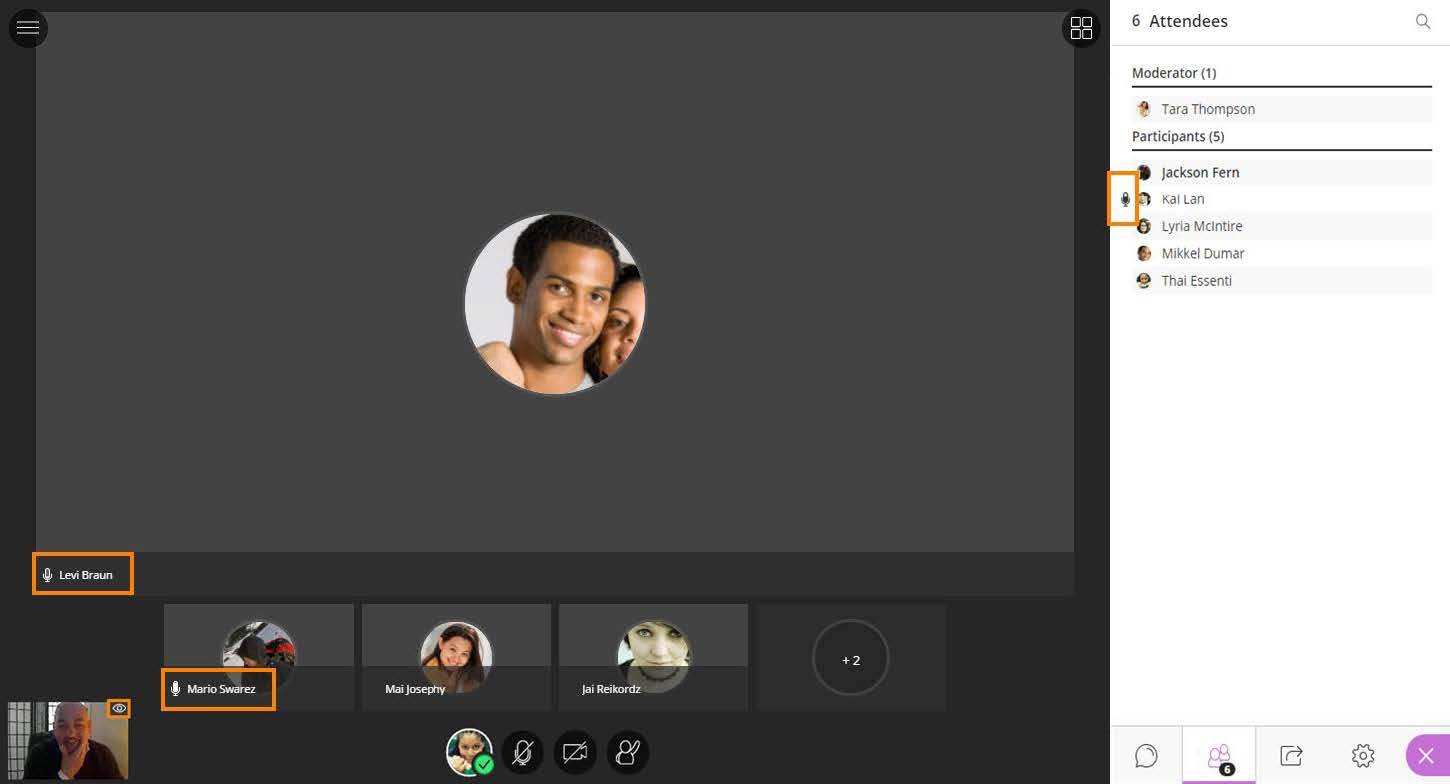
In addition to changes in the Audio and Video Indicators in the Interaction bar, audio and video indicators appear in other places within the Collaborate Ultra interface as reminders to the user and allowing moderators and other attendees to know who is transmitting.
On both the video display and the Attendees Panel, microphones appear next to participants who have their audio turned on. A filled microphone is used to represent the current speaker. As with the follow-the speaker view, the filled microphone moves to the current speaker as the discussion unfolds.
Additionally, Collaborate tells you when others in the session can see your video. If you see an eye displayed on your video transmission, others see your video in the center of their screen. If you see an eye while content is shared, others see your video as their picture-in-picture.